


Hiya! I’m Samantha, Garage Kit Builder & Illustrator in the USA.
For Work Schedule Updates - Click Here
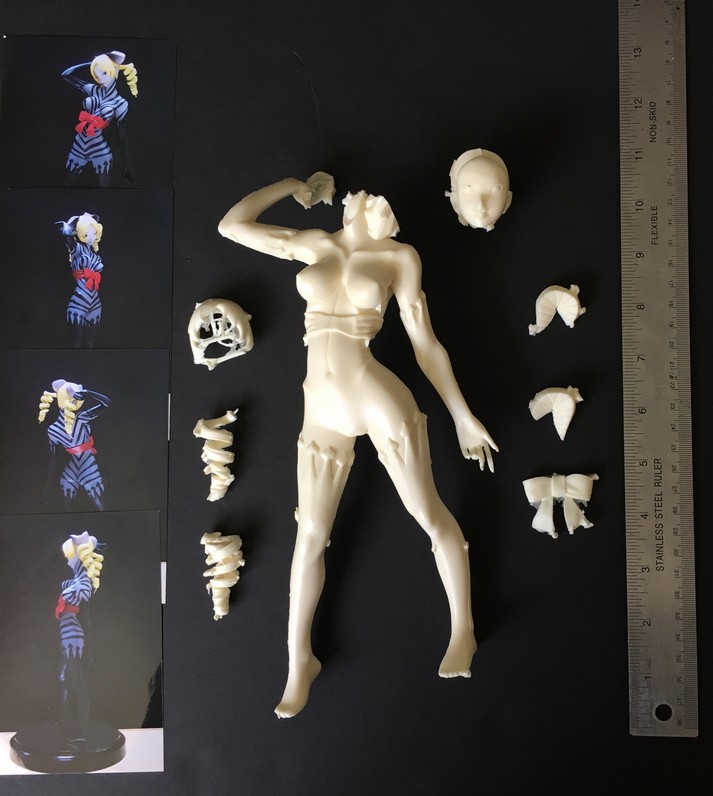
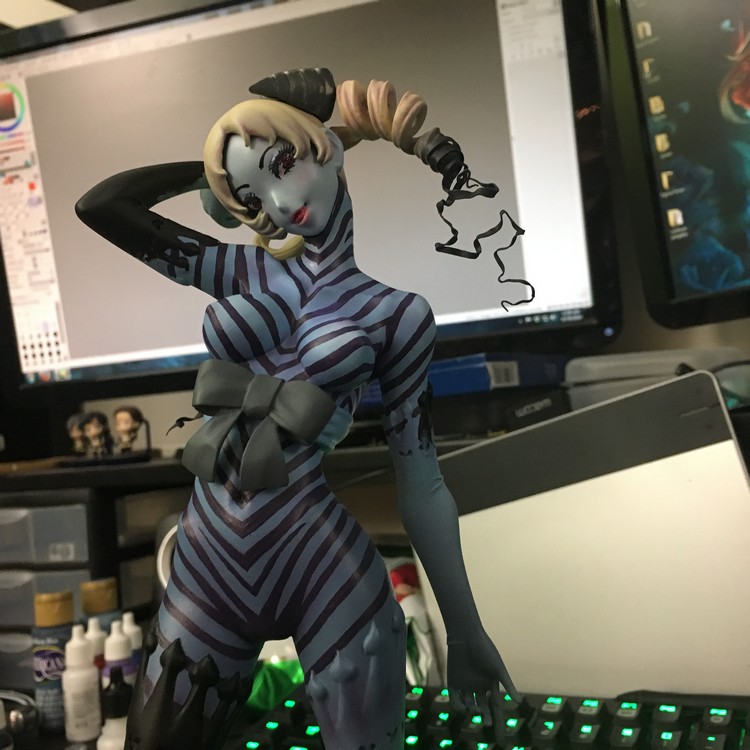
1/6 Succubus Catherine
Commission in progress for an international client of mine. Wants her original cast to mimic the game screenshots and illustration. A lot of customization's will be done such as: Custom grunge base with diamond floor pattern. - Extended hair (see illustration and screenshots) Arms and Limbs redone for the tips of her gloves (to match illustration) Limbs will be cut off to make way for easy customization of gloves, leggings and easier painting process. Also including convenience of shipping. Color scheme matching screenshots and body gradient tone from illustration but still using colors from screenshots. More customization's will be added if I left out anything.
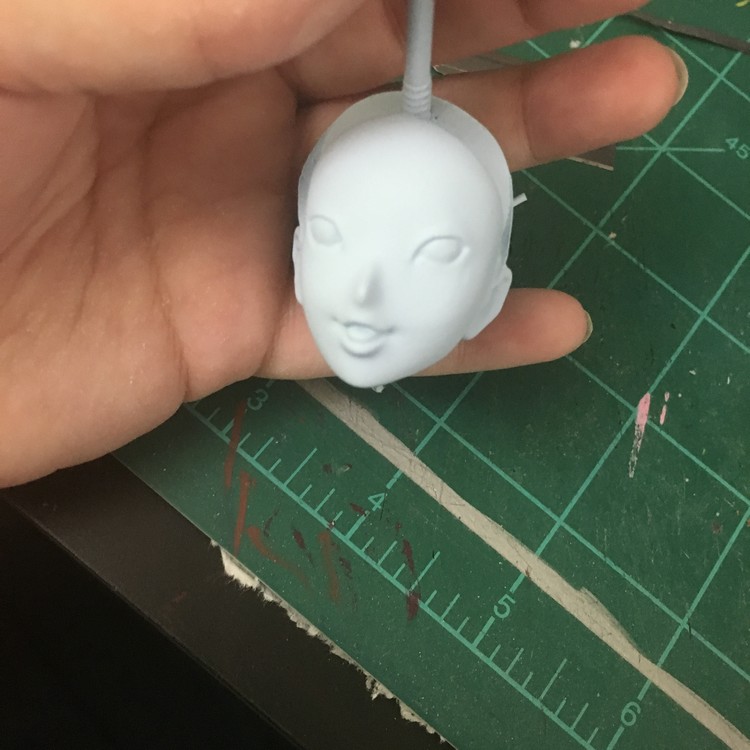
Once I received the kit, I inspected the parts. This kit was in rough condition in the cast and needed aloooot of filling and clean up work for how simple she was. Alot of resin build up in her hair drills, fingers needed resculpting given her fingers being casted in bulk, as well as her hair needed resculpting.
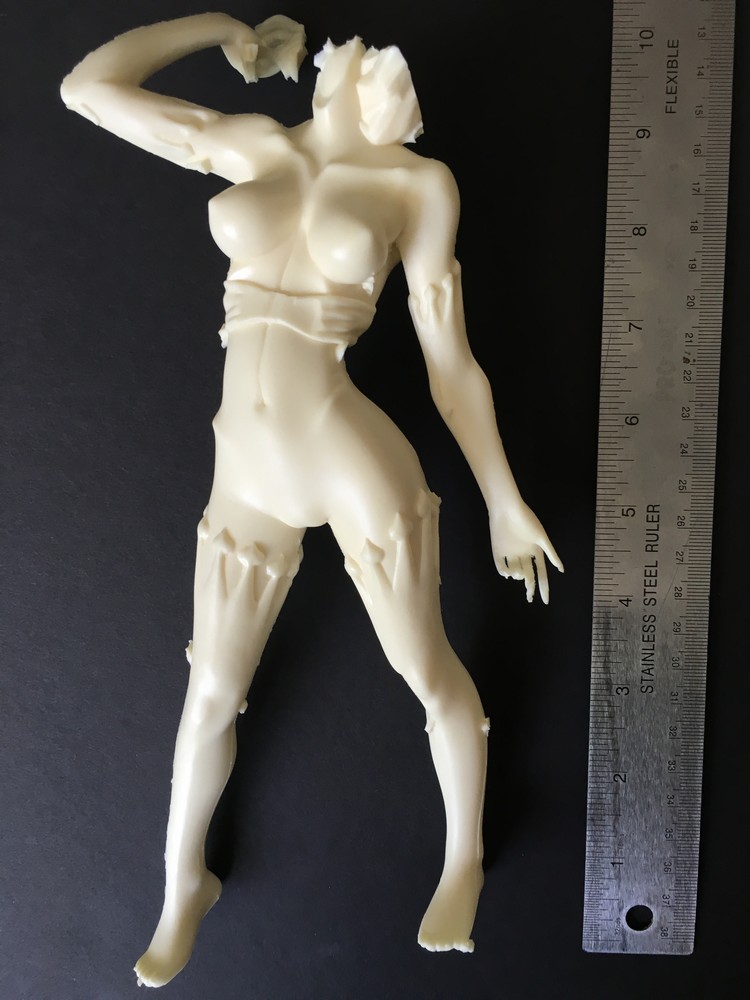
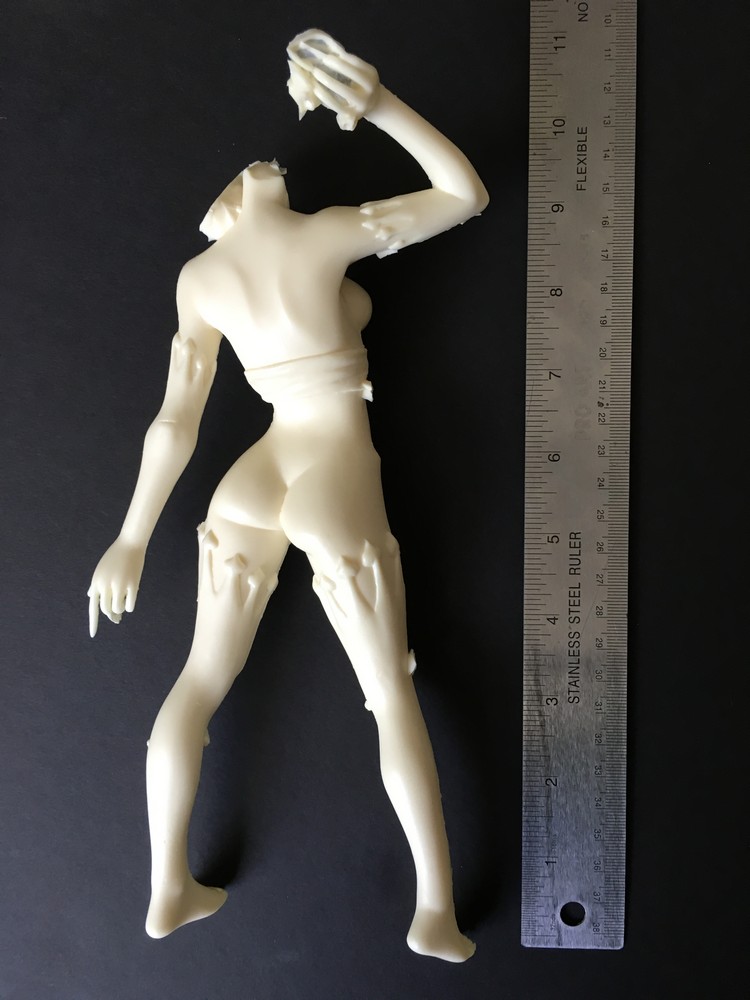
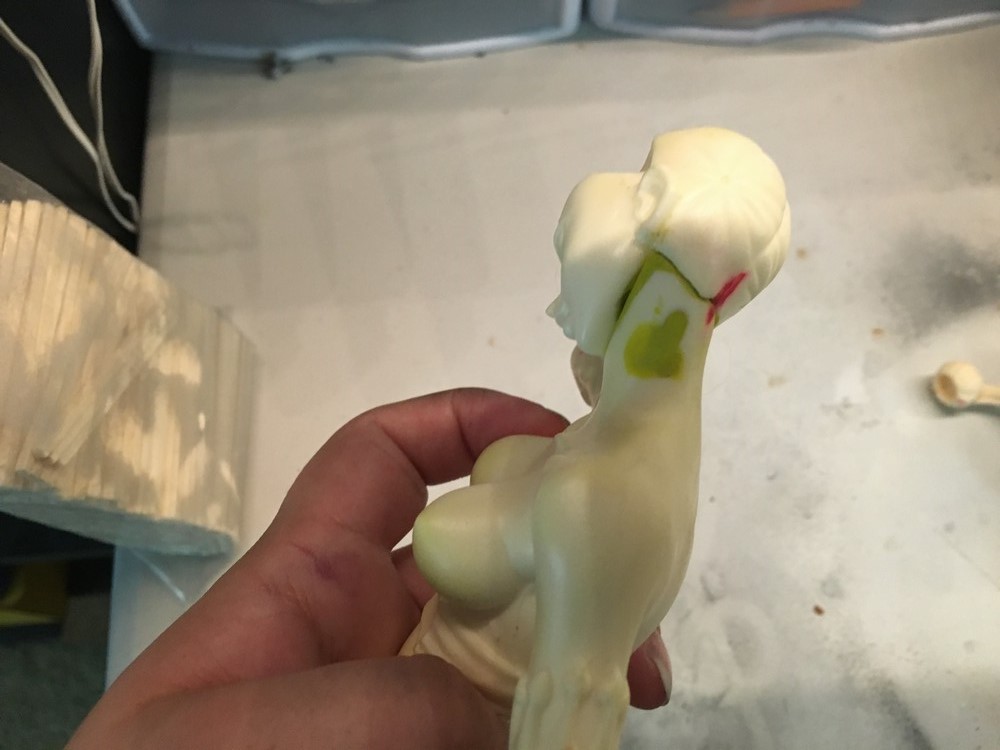
This was more over the most frustrating part on this whole kit was her neck connection. It was cut as much an odd angle, it's hard to get a good support pin in place and have it flush with her neck samlessly. Needless to say is I had to drill through her neck at such an odd angle to get this too work. Took a few attempts but it worked in the end. Eventually I will fill in the rest of the gaps once everything is flush.


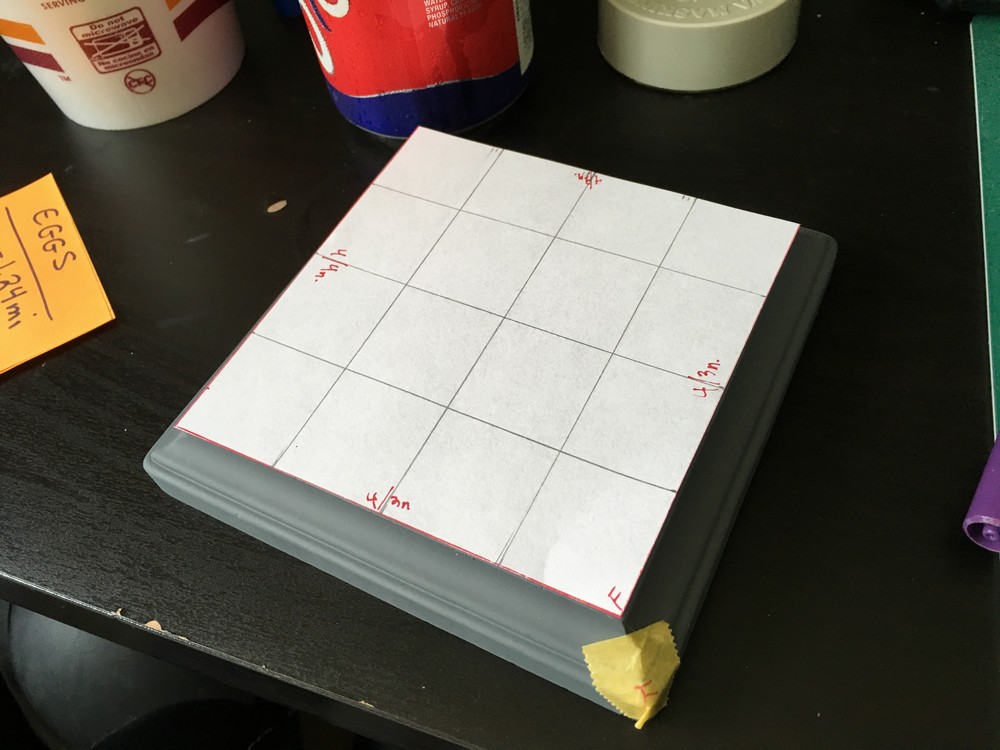
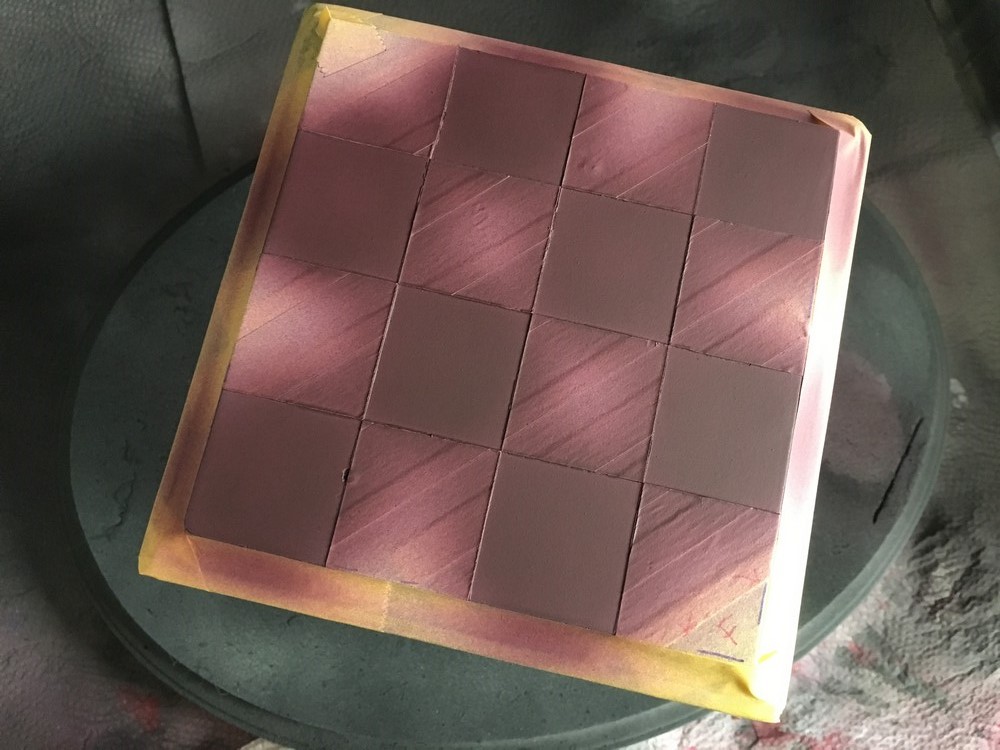
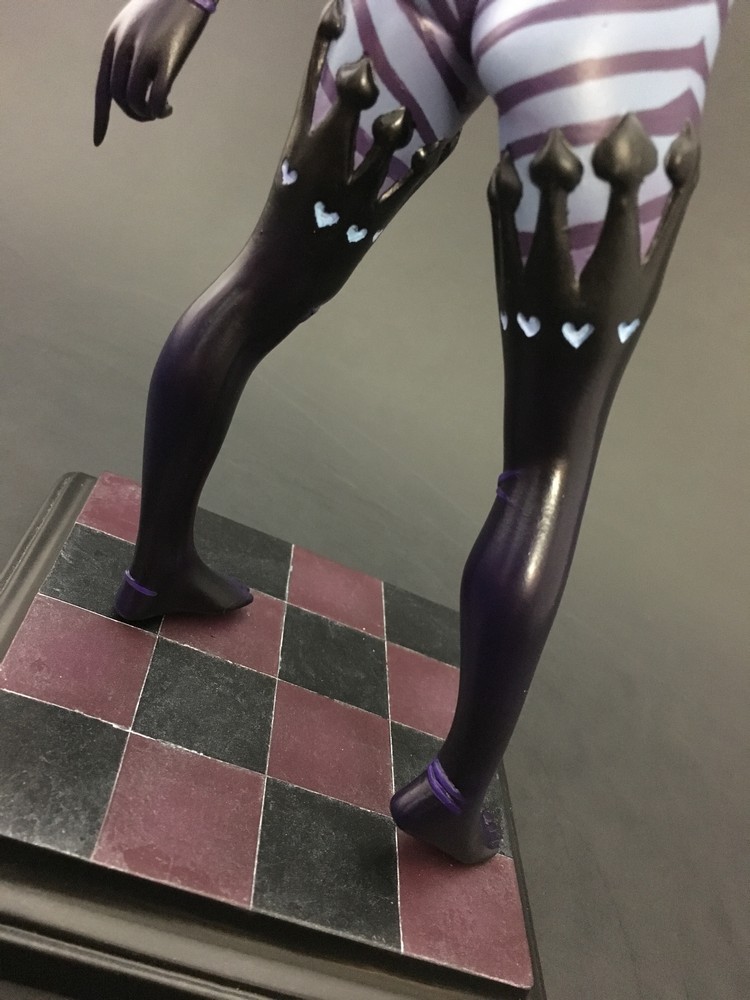
My cllient requested I reference off of a wallpaper that has a grunge type of background with a diamond checkerboard theme. Given a custom base in the shape of a diamond was not available, we used a square base and just did angled tiles that way. Sadly the base at at such an odd size I had to modify quite a number of times to get the lines evenly spaced out.
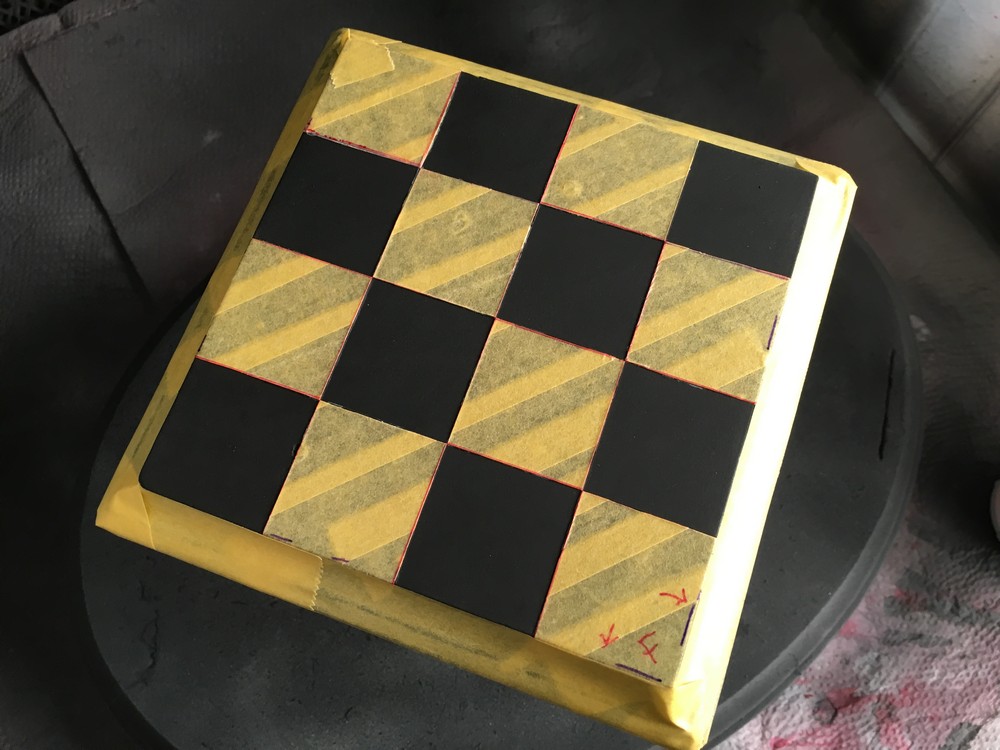
Once I had a rough layout on paper how I wanted the lines to be, I layed out some masking tape over the base once I was done priming and adding a few light coats of black to the base. After that I drew the lines on over the tape with sharpie. Then began to use a ruler to cut into the wood and peel off the blocks that WILL be painted a different color. Anything still covered will NOT be painted.
Here I added 3 light layers of white so I can apply a bigher purple tone to the tiles.
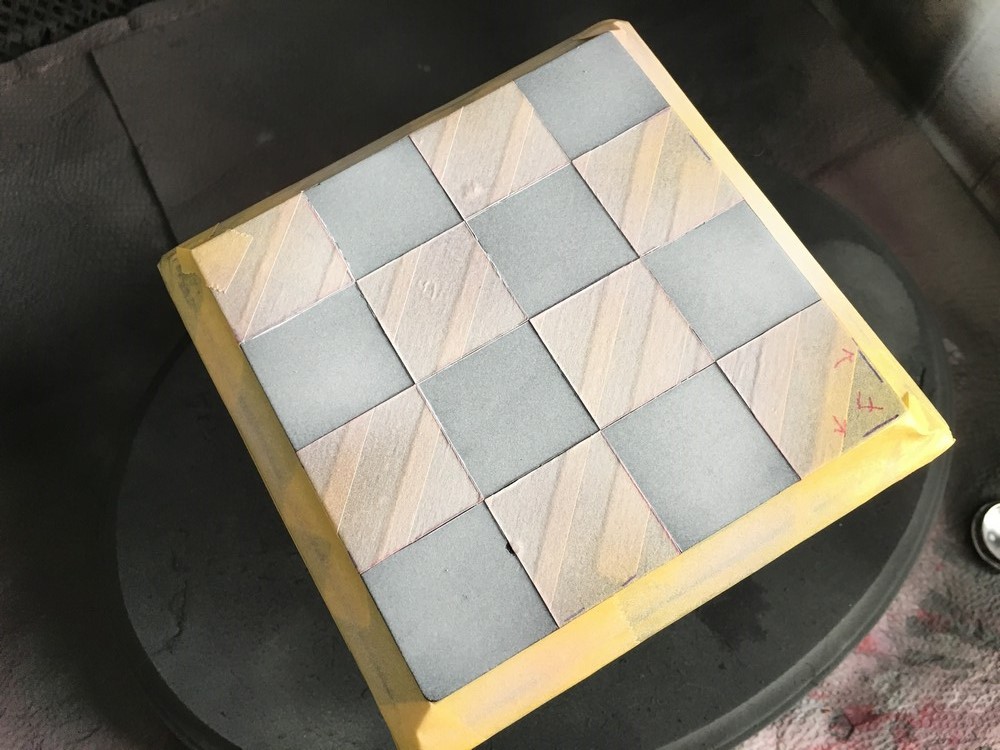
Once the base color was added I then started to plan an extra highlight to the tiles.
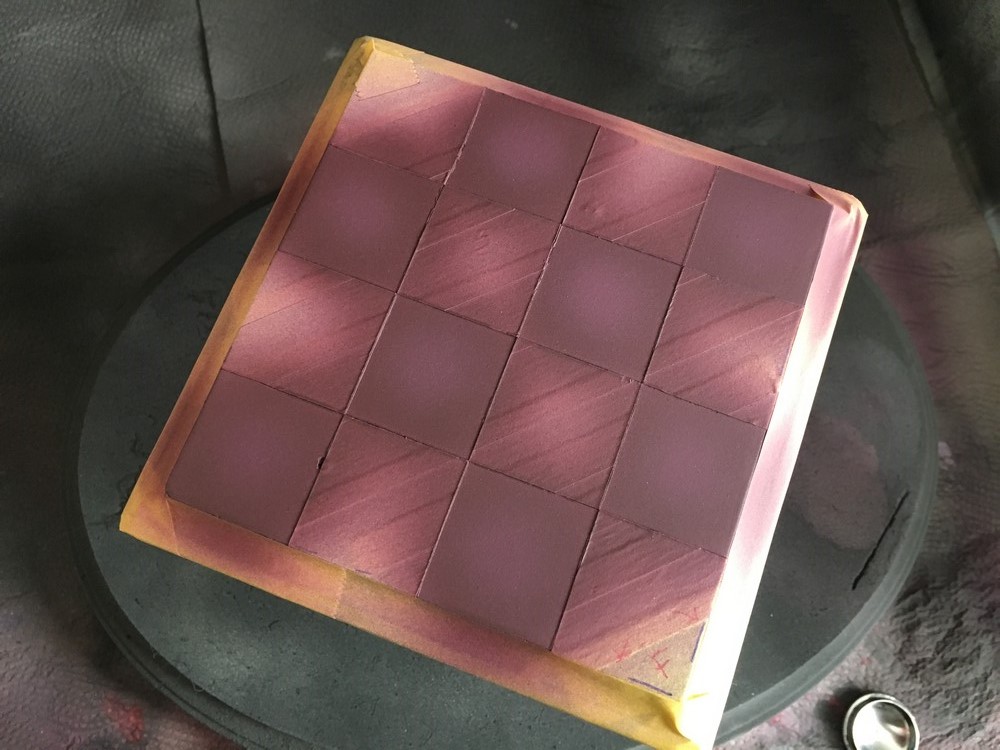
Here is when I added a shade lighter to the tiles.

This is the finished result. Some areas needed touch ups but overall came out okay with not much paint peel.
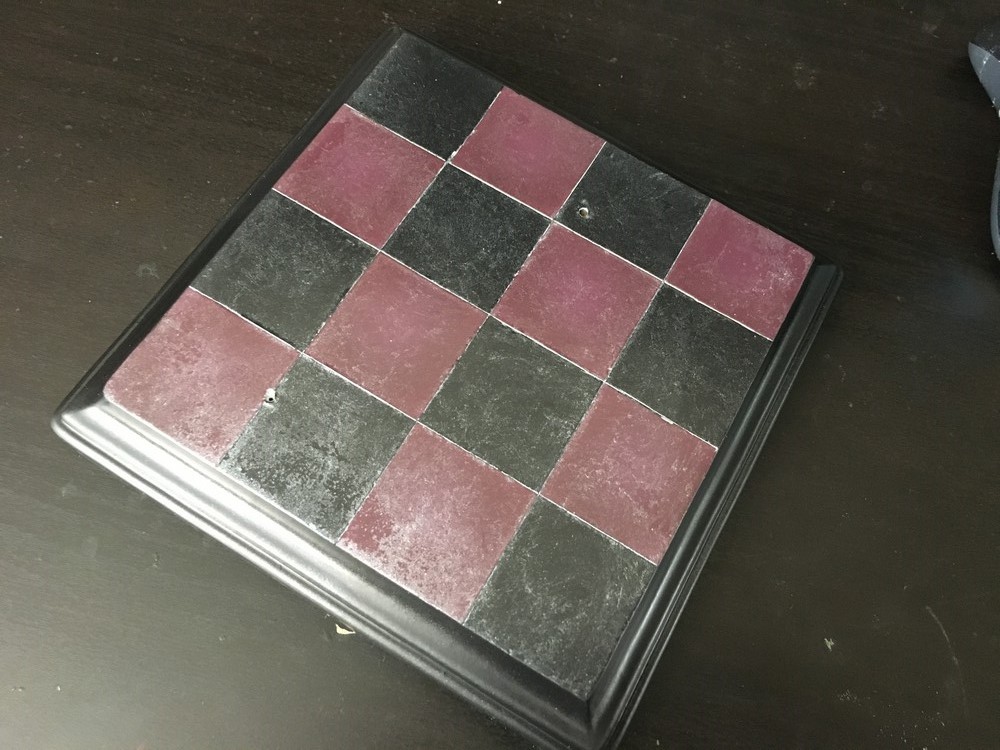
This was a bit tricky cause I wanted to make a faux finish like you see on walls in homes. So what I tested on this attempt was watering down some metallic paint, dabbing a dry paper towel to it and brushing excess water off and dab dab dabbed the base, some areas I wiped away and silver got into the cracks, but that is okay though.
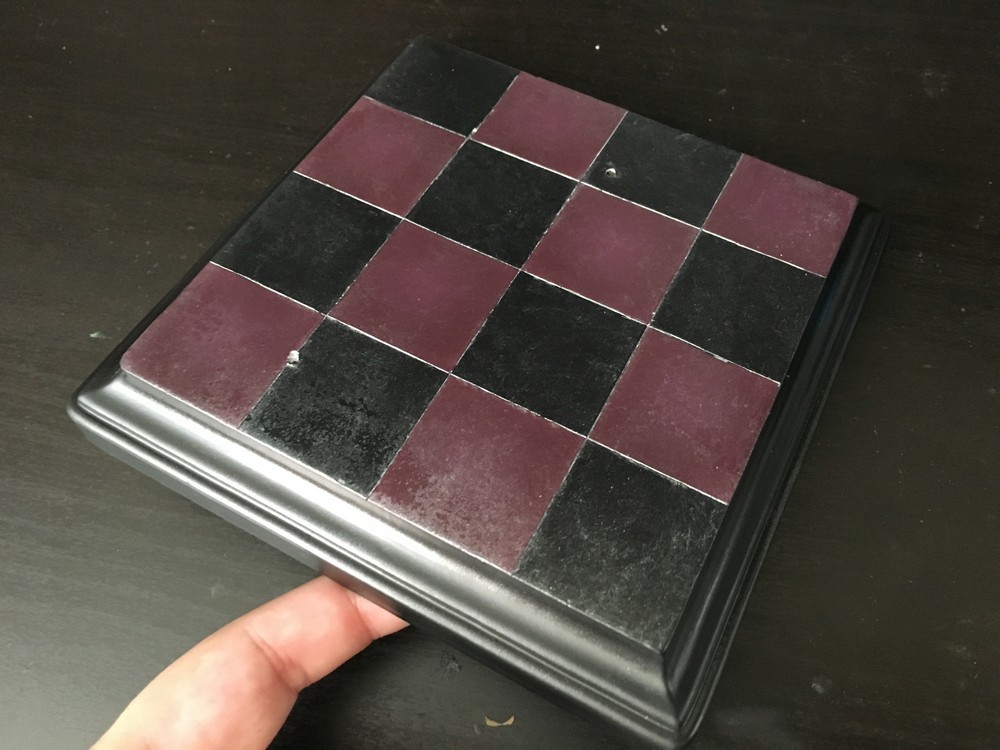
In the end after drying and sealing in a matt satin finish, it leaved a two tone effect in a way where you see it, no you don't!
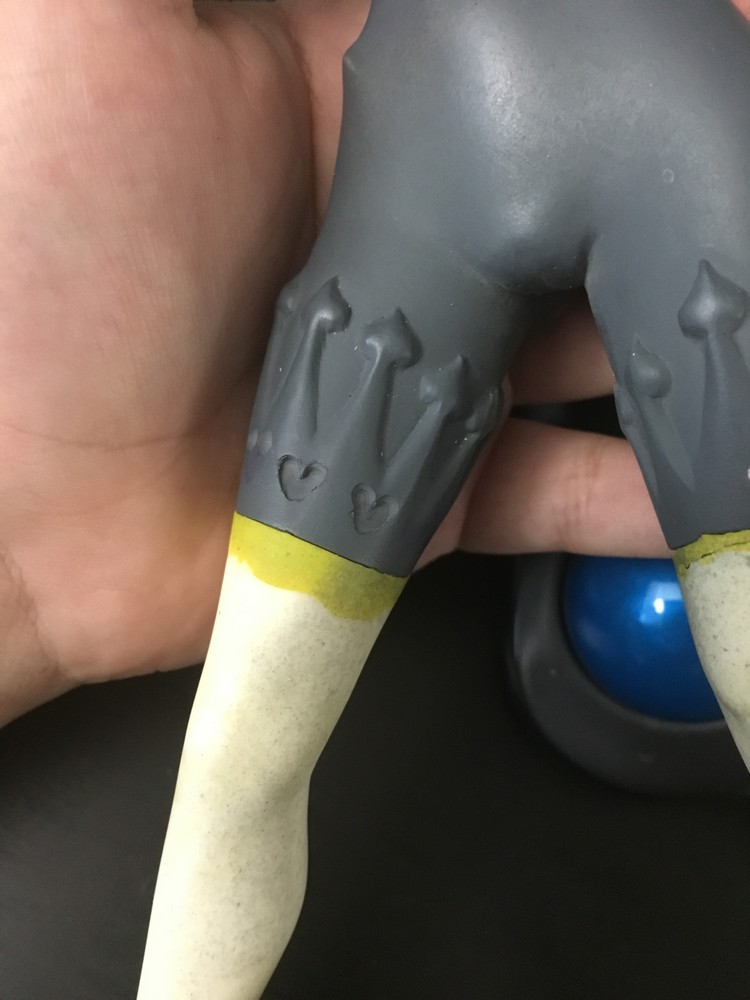
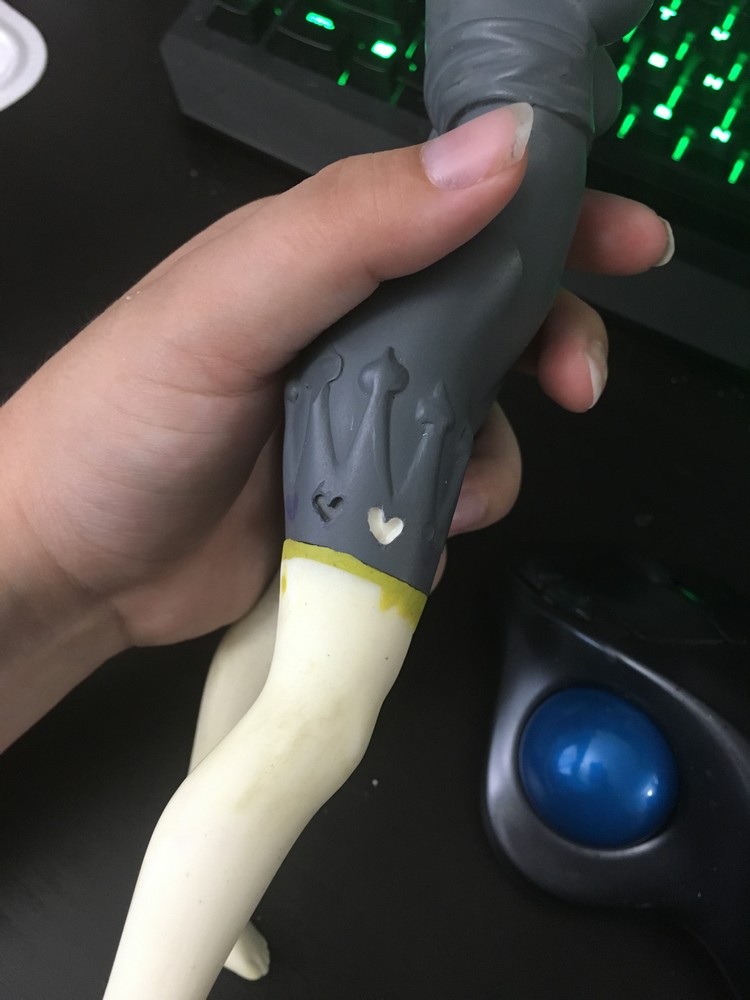
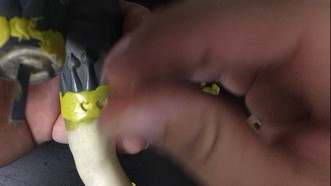
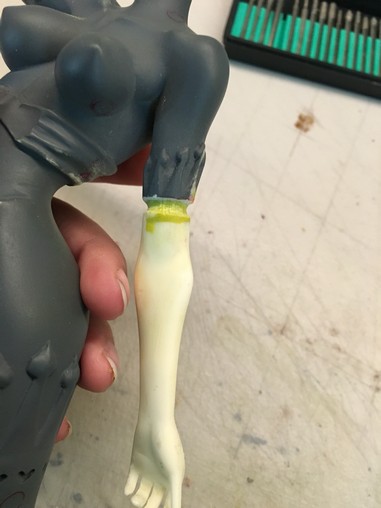
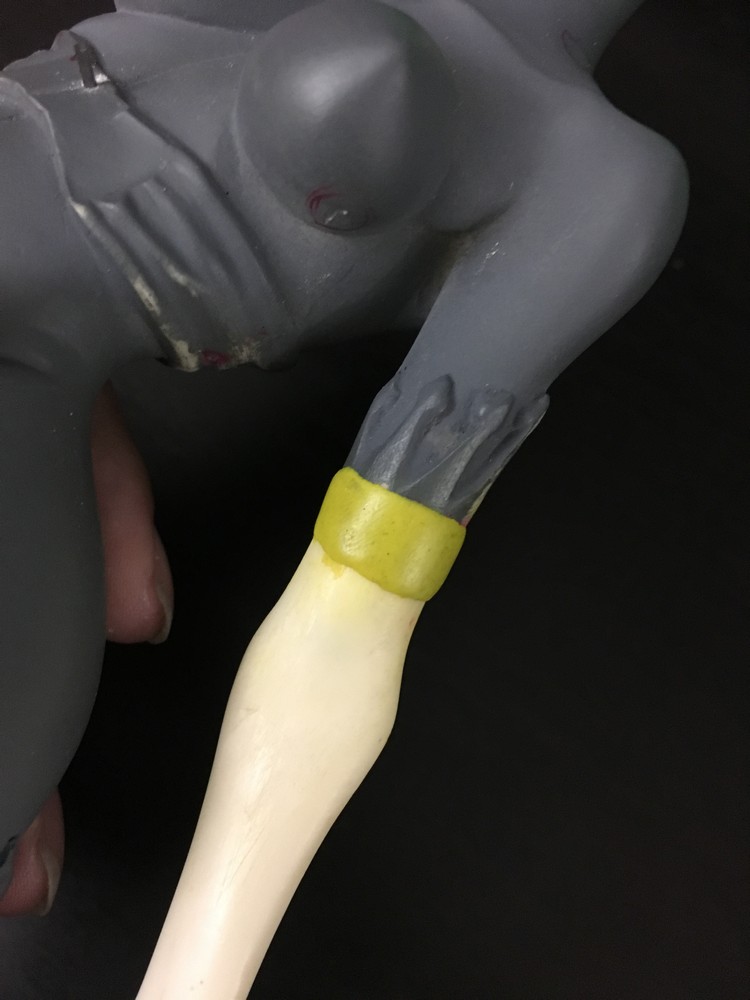
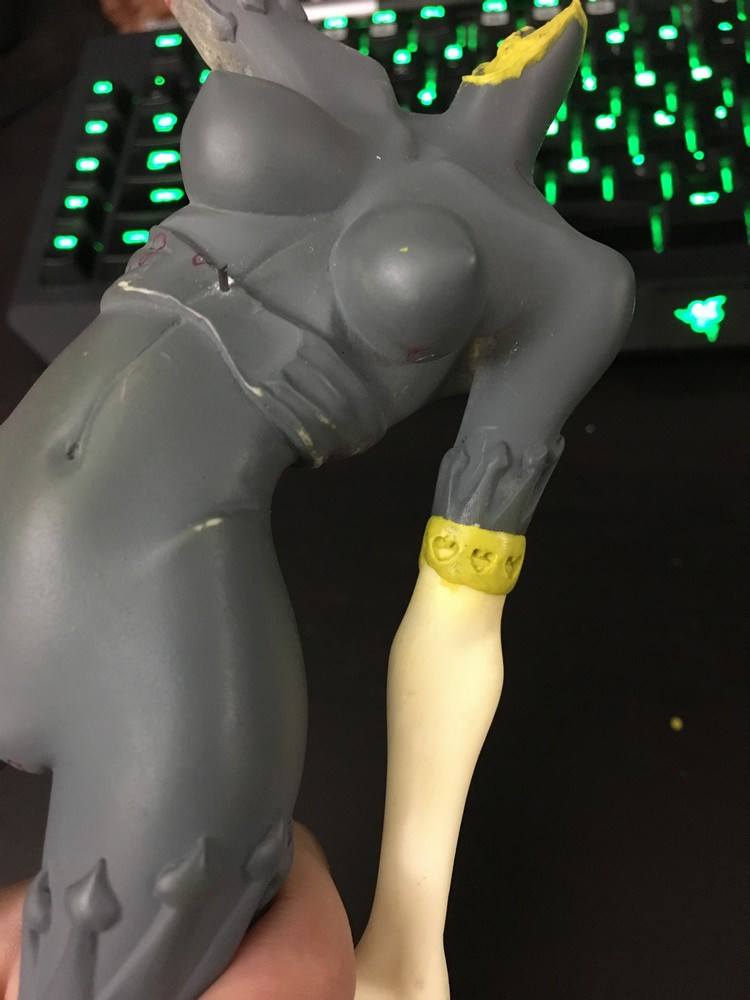
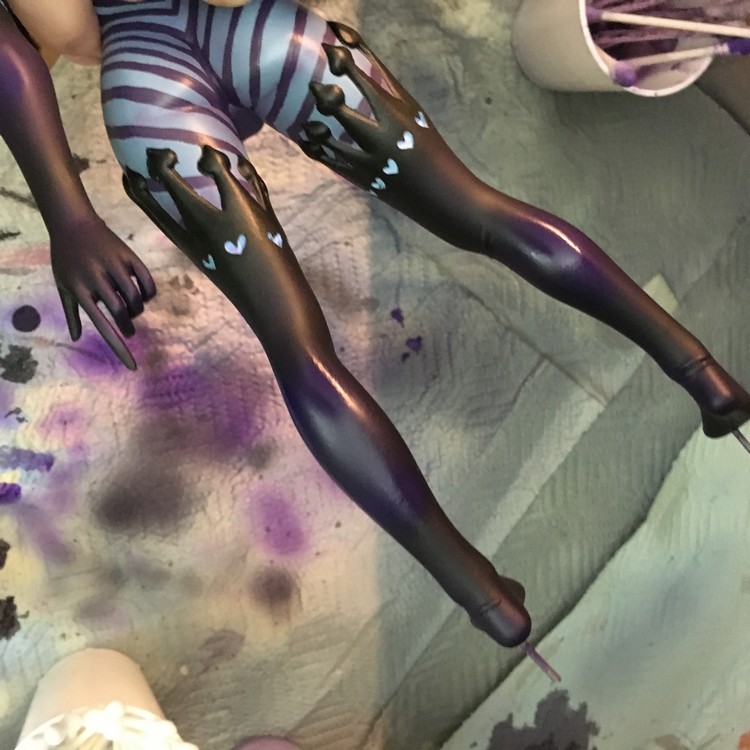
My original idea was to cut the limbs off to a certain point and redo the tops of he rleggings using a flexi plastic and cutting her legging out to make them pop out sincead of attached to her leg. Sadly the ideal failed to to cutting issues but either way the arms and legs needed to come off due to it being hard to sand in a few areas with them on and drilling details. So here is the fun part...given that the sculpt left out alot of details we discussed what would be best to have it match with an official illustration and the color schemes from the game. So I offered to carve hearts into her leggings and gloves. Though my first method didn't go well and caused more frustration, I should have went with my gut on this one and proceeded another method whuich in the end was in my favor. So for this I had to drill a bit of her leg off then fill it with apoxy to fill that gap so it was flush with her skin. I will later sand off any bumps of lumps from excess putty.
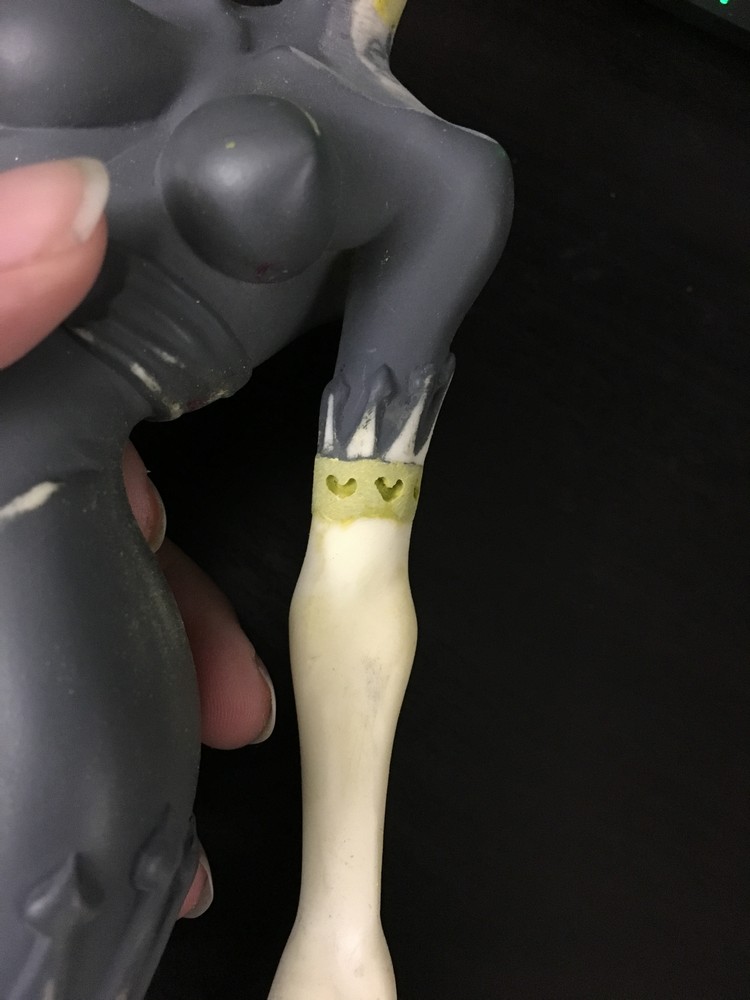
I then started dotting a guide using a knife of how big and the position of the hearts will be. Given this sculpt has an odd number of detail on each legging they won't look consistent *shakes fist* So yeah after carefully cutting them out when the putty was curing a bit and was less sticky, I used a acrylic dotting tool to round out the edges, then I bleneded the putty all in to have less finger prints and errors with my finger as it was curing.
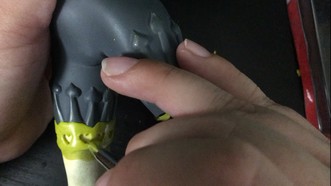
Cutting out hearts and rounding out edges, pulling and pushing clay into position, then used finger to smooth and blend it all in. Since I will be indeed sanding excess putty off to get the ideal finish with no seamlines, it will bring the height of the putty down so the heart details don't seem like they are carved into her ACTUAL leg, just thin enough to look like legging fabric, haha. xD
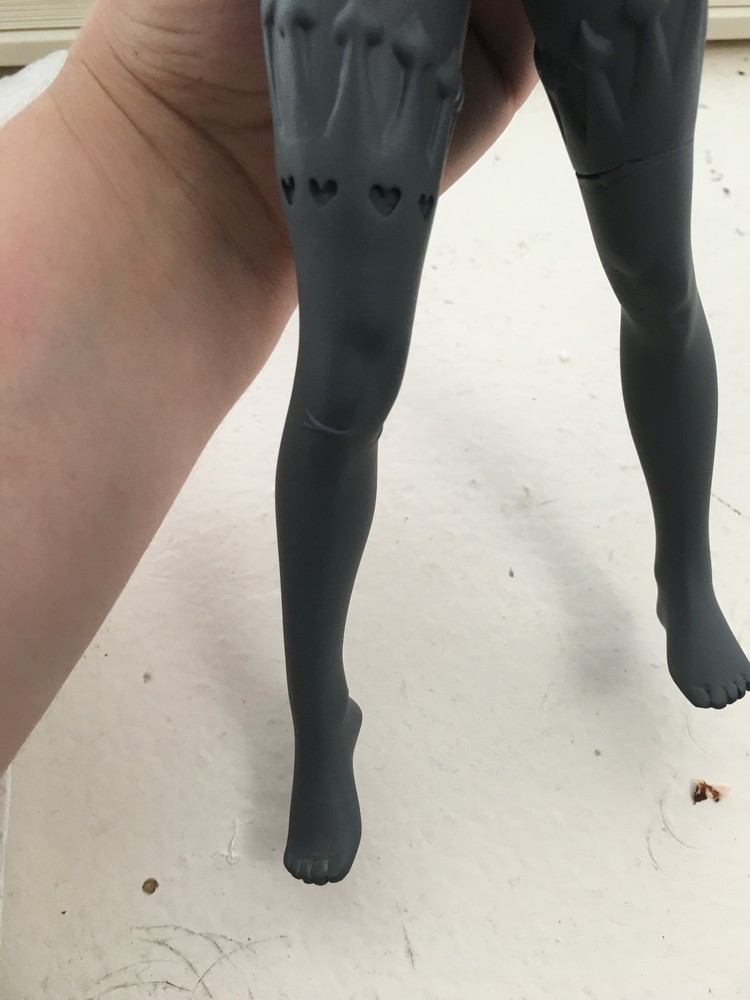
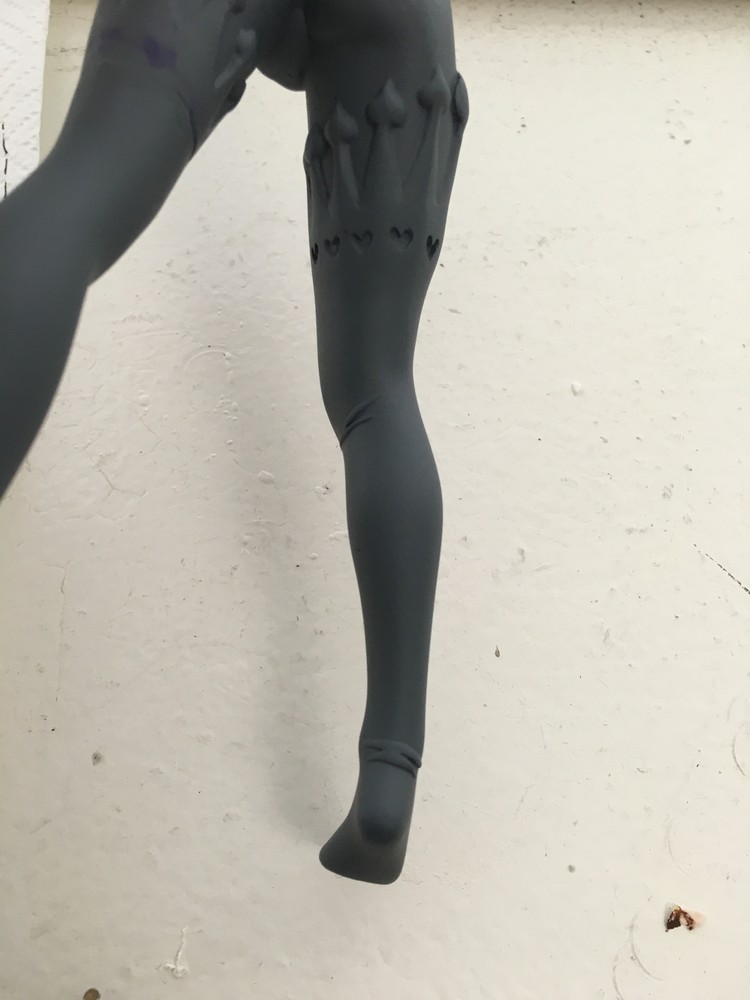
Just got approval today to add minimum clothing folds to her leggings and gloves since everything is super smooth. I will need to fix these up some more and blend them in more since I needed to add quick ones to get the idea across what I was talking about. I'll need to trim a bit of the bottom part off since it wound up being too thick xD Added more clothing folds, some need buffing out still and be less bulky.
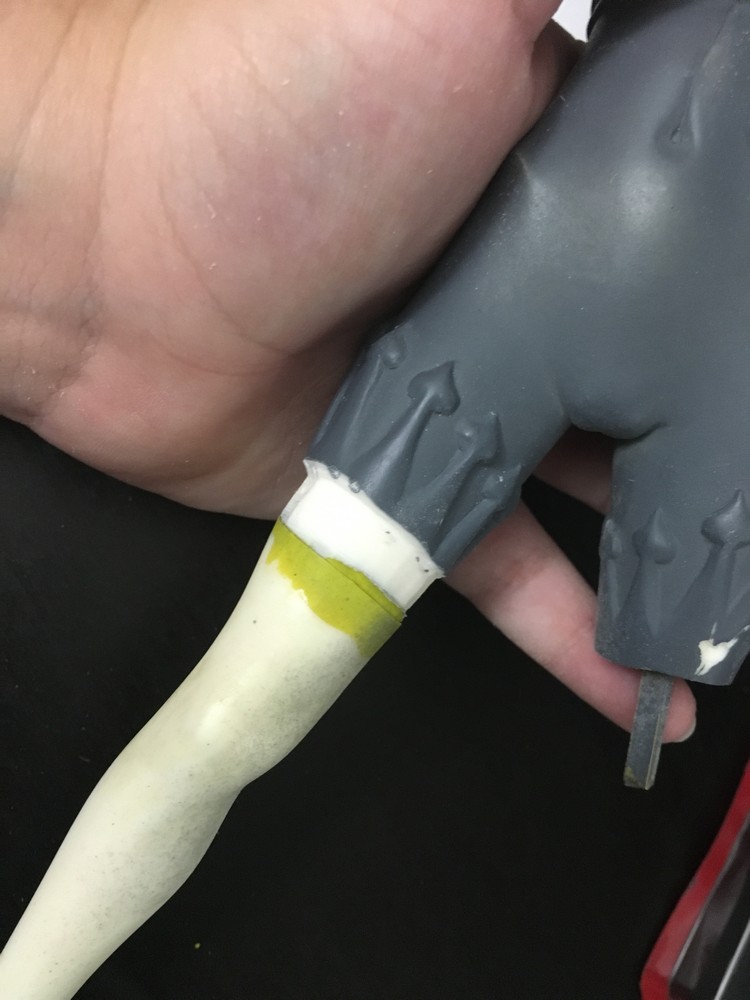
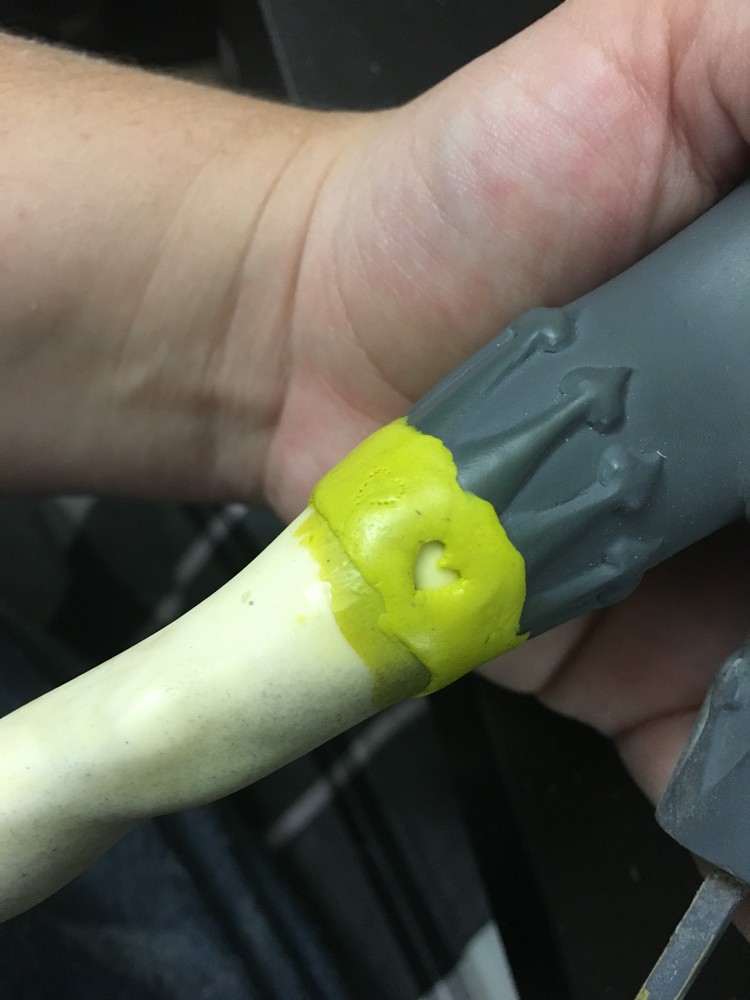
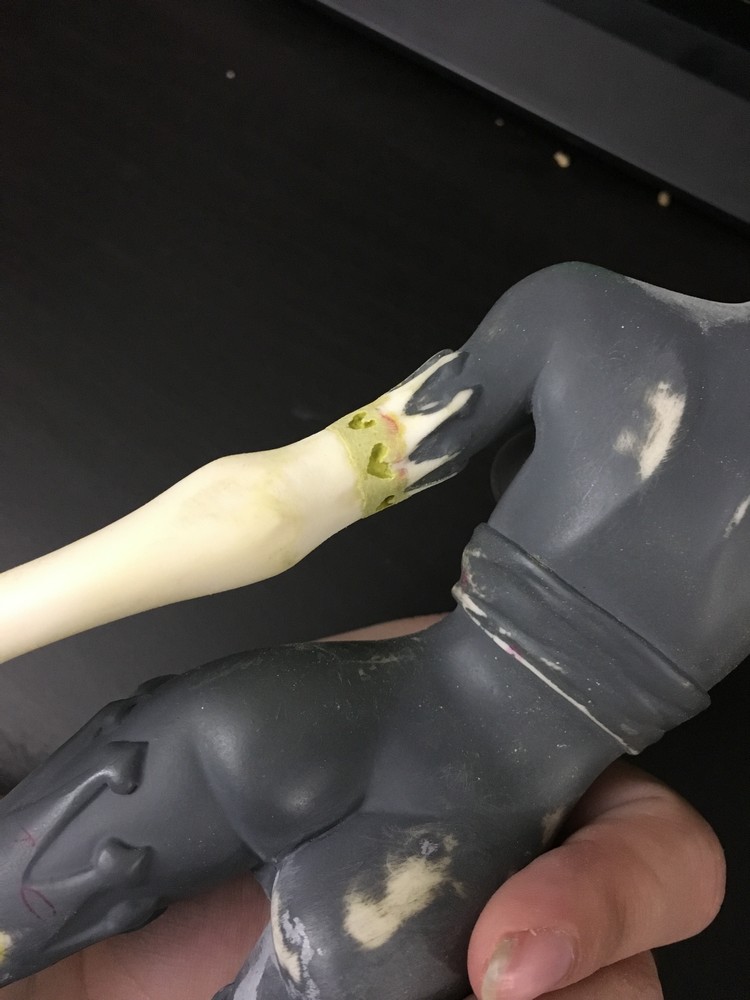
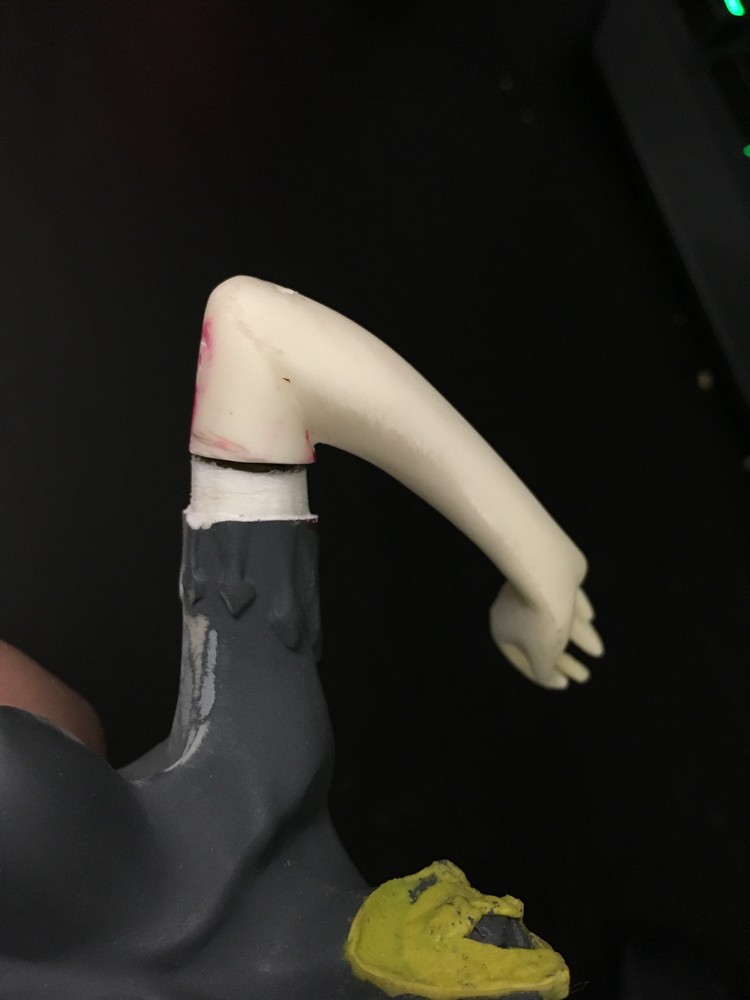
(Left) Drilled the seamline in her arm so I can fill it with putty to carve out hearts. (Right) Added putty and let it cure for a few minutes before cutting out with a blade, that way it doesn't stick as much to my blade.
(Left)This was the first attempt but wound up scraping it out because the part B of my putty was messed up. So I had to mix up part B a bit and re-apply the putty fully blended to let it cure properly. The other issue was I cut the hearts too low and was showing a step gap in the hearts. (Right) After the 3rd attempt it finally worked and cureed properly. Then proceeded to sand the remainder putty so her arm is flush. Will require 2 test prime attempts and filling to be compeltely smooth.
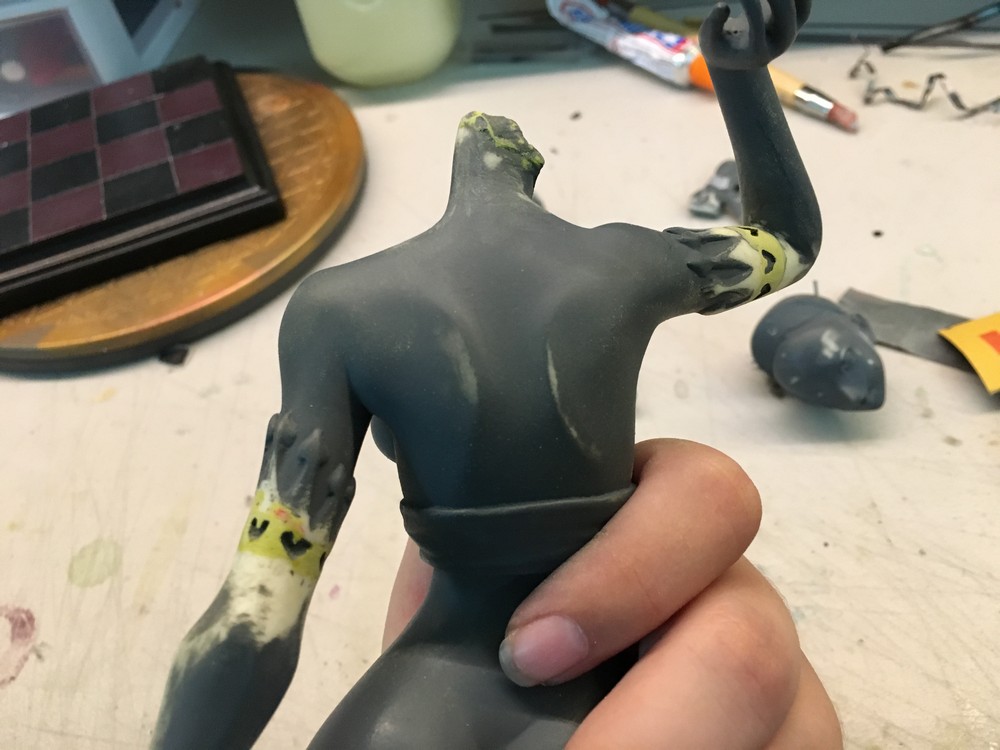
(Left) Back side in sanding excess putty, still need 2 primer tests.

(Right) Double checking areas with bumps and more pin holes in the resin.
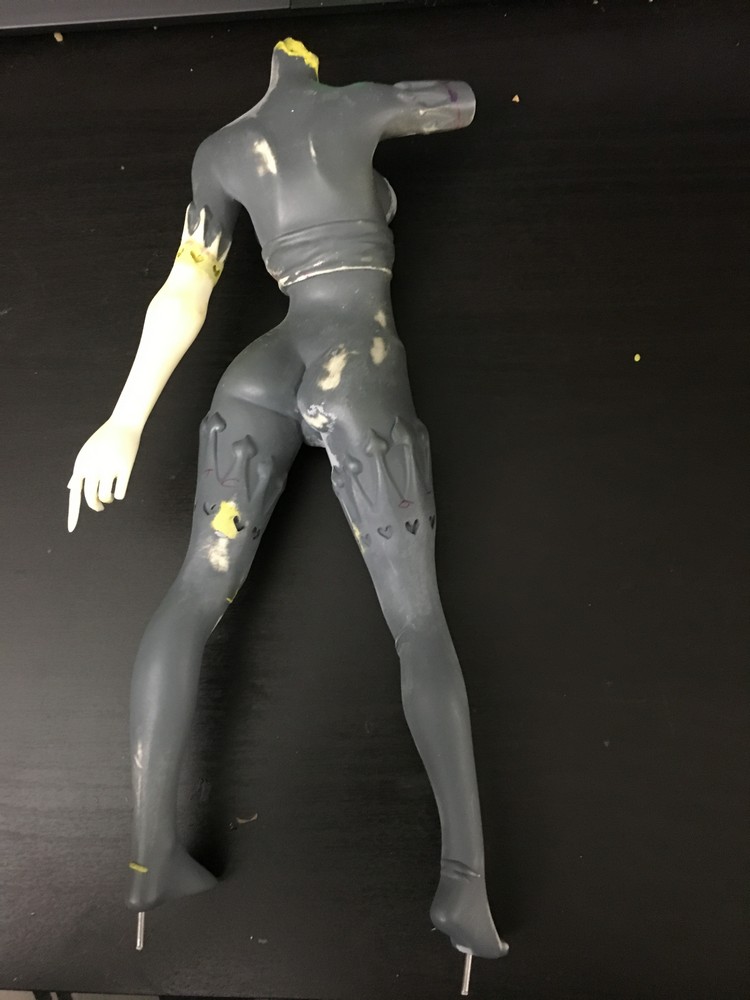
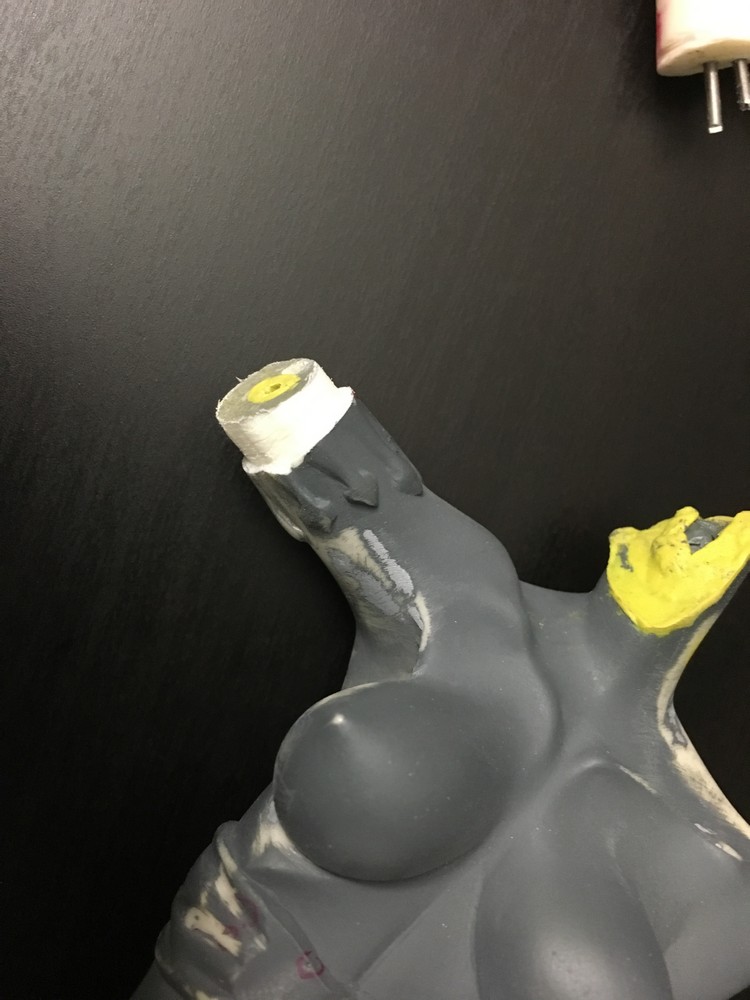
(Left) More issues on the back, eventually once I fix all the parts with another test prime I can smooth everything out even more for a final prime coat. Not sure if it is the angle on her right leg, but might need to add putty to give her leg more volume. Might be the angle. (Right) Finally working on the other arm. Drilled with a flat sanding bit so I can engrave hearts into her arm covers at the right depth.

(Left) Attached arm to visualize where hearts should go.
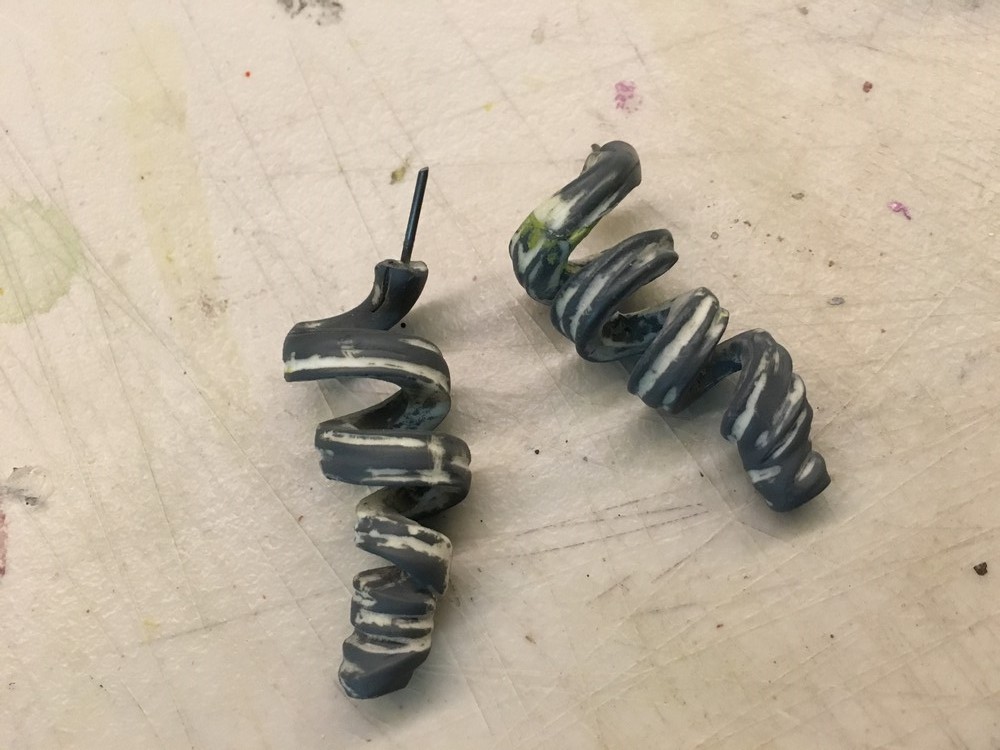
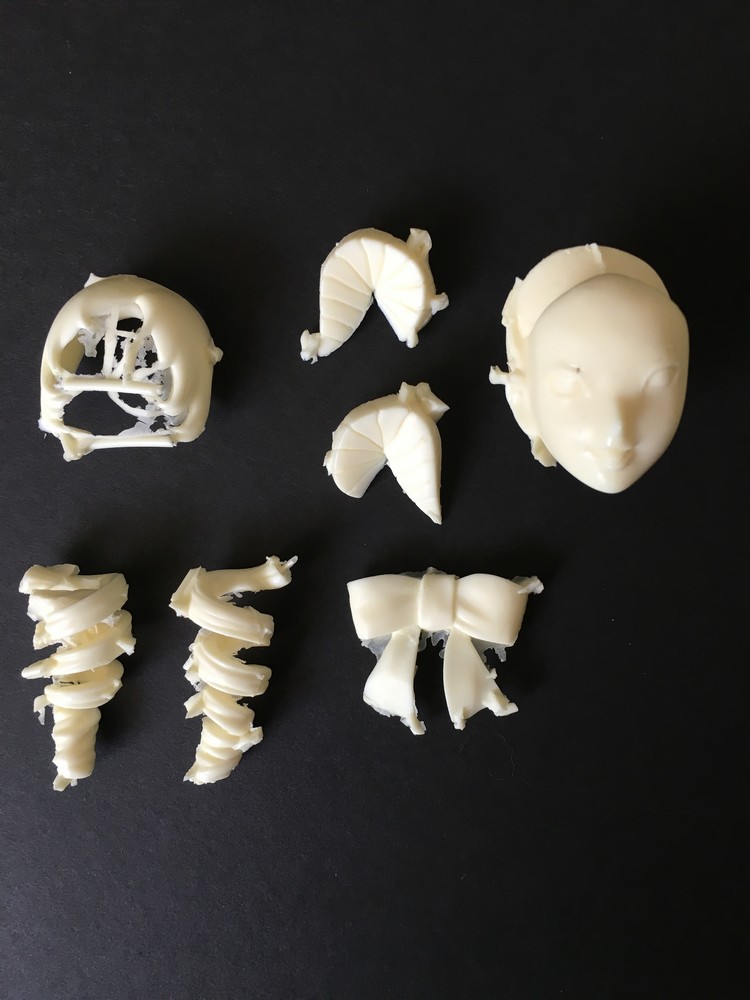
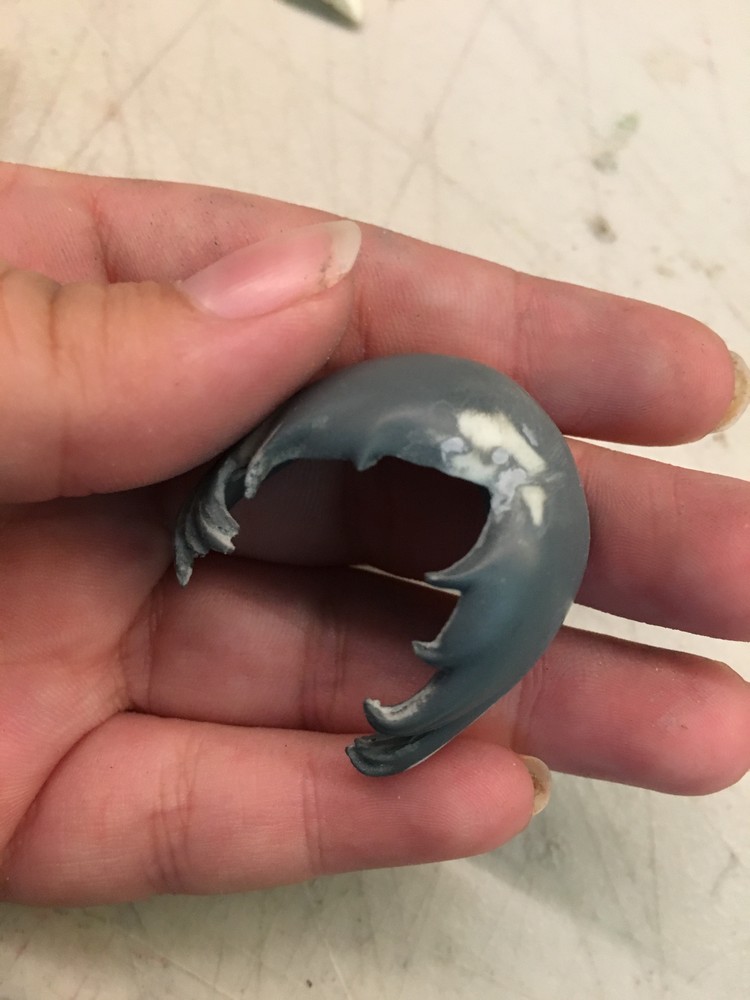
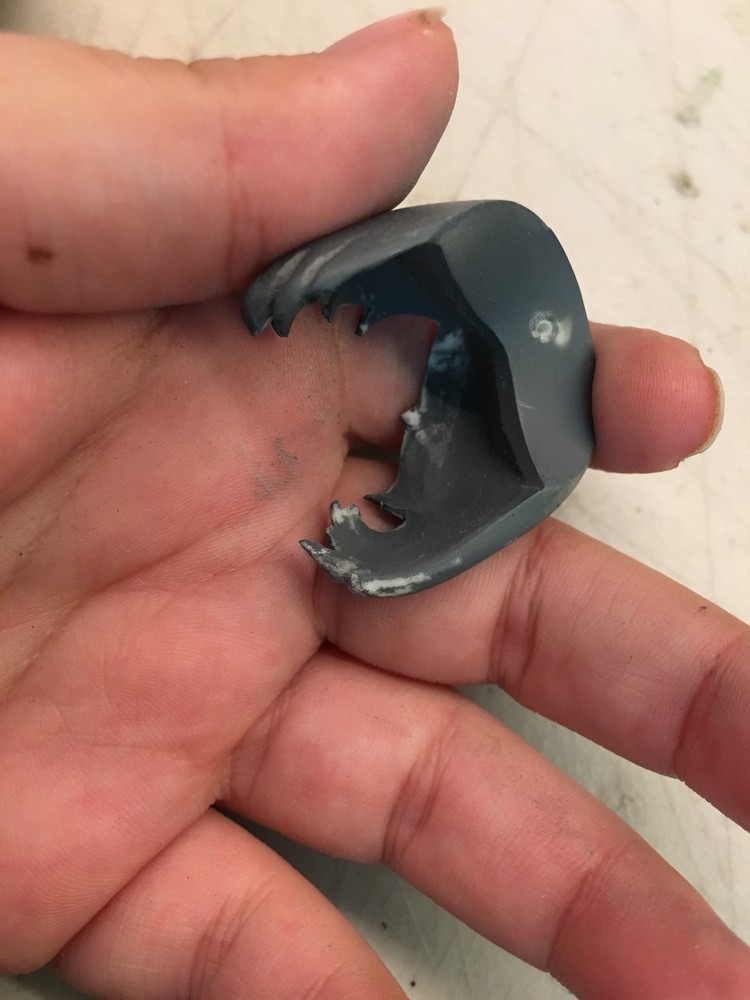
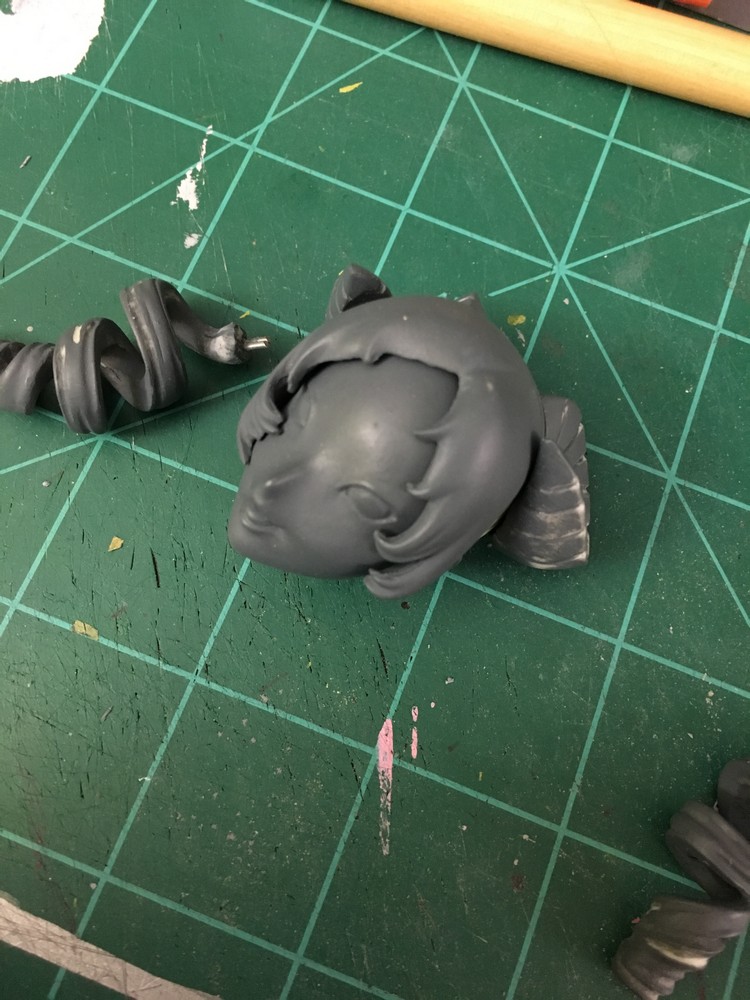
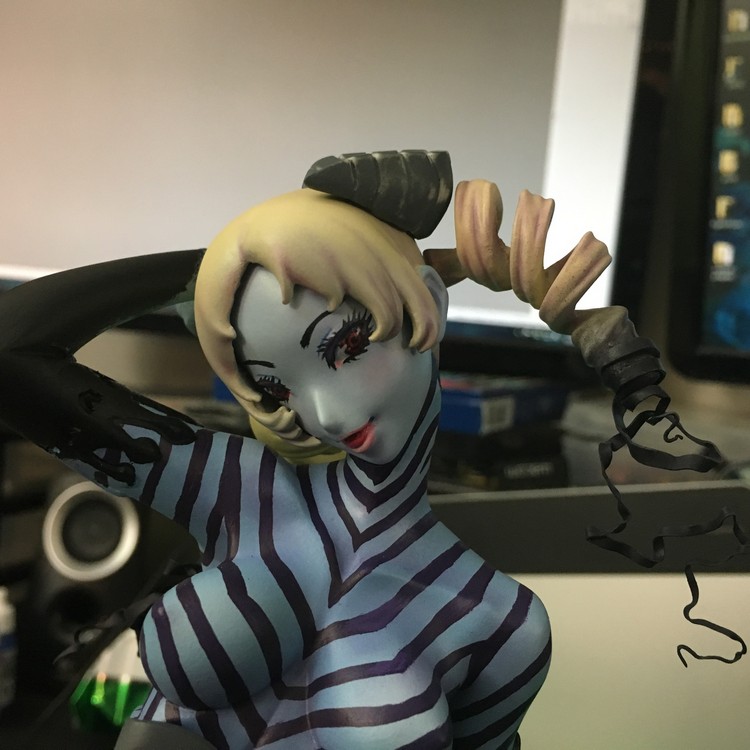
Used a few roary tools to carve and fix her har drills. They were so impacted with resin these where the longest I had to work on these pieces.
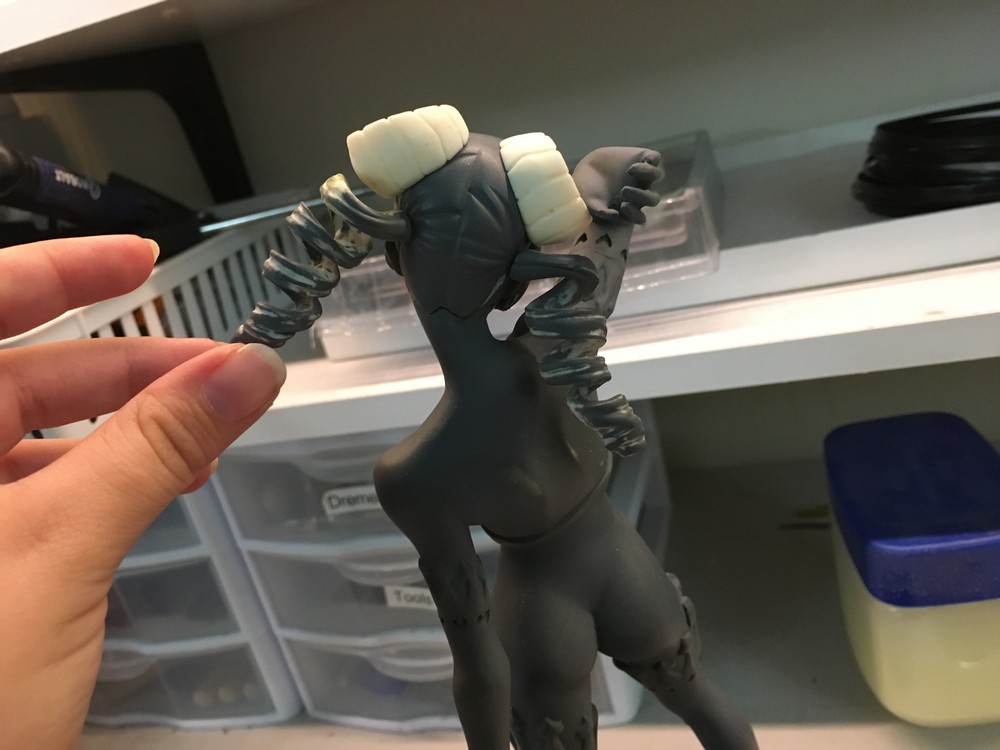
Warped her hair drills a bit so they appear closer to her head. The original the hair drills were father away and looks very strange. I will still heat bend once I get the final igure to her head, but for now, need to sand areas more in her hair drills.
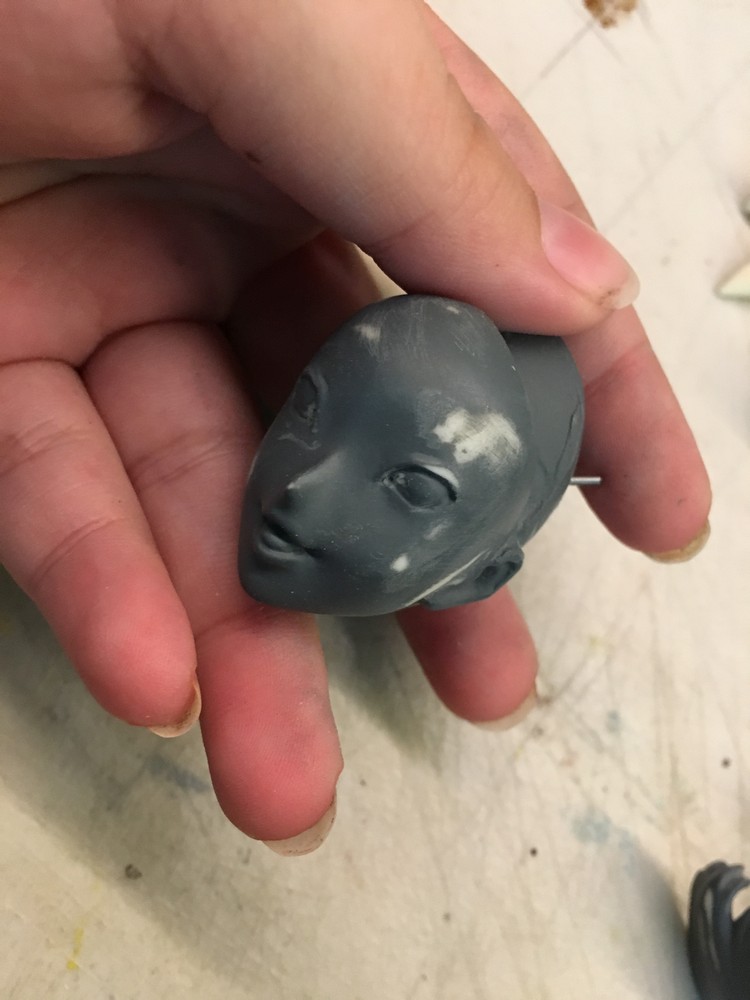
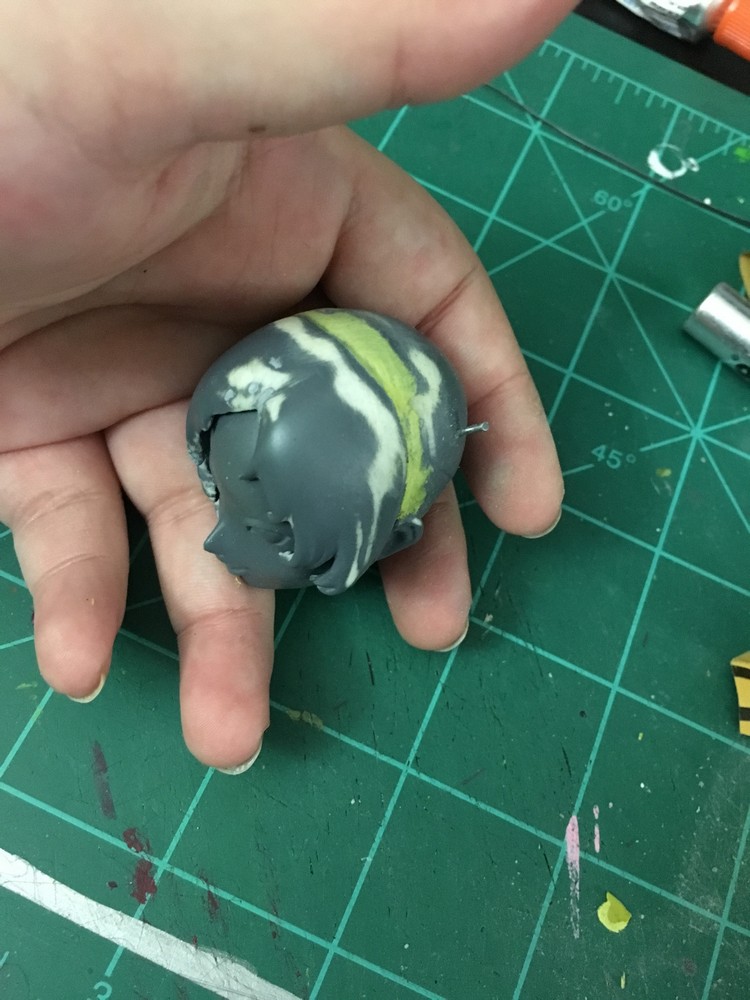
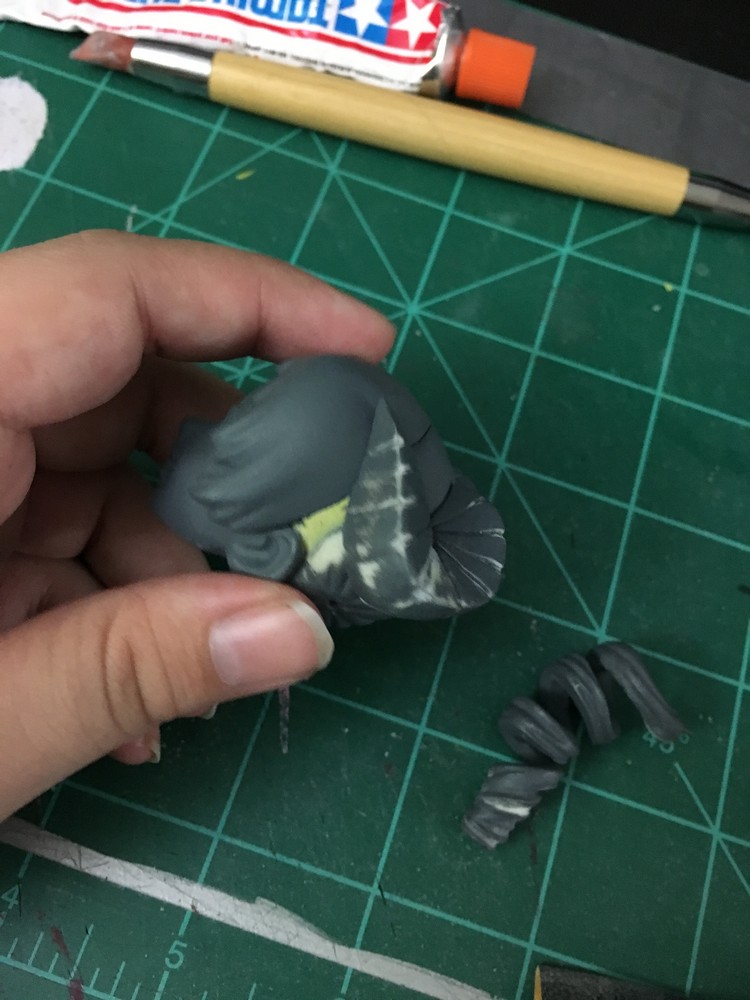
(Left) Took forever to clean up her face too, lots of pinholes and popped bubbles in her eyesockets that needed careful attention. (Right) Big seamlines present before but forgot to get previouis photos, also had large hols which I thought were connection guides to her hair drills, I was horridly wrong to know they were just huge popped resin bubbles. Smothes it all out so what it is now.
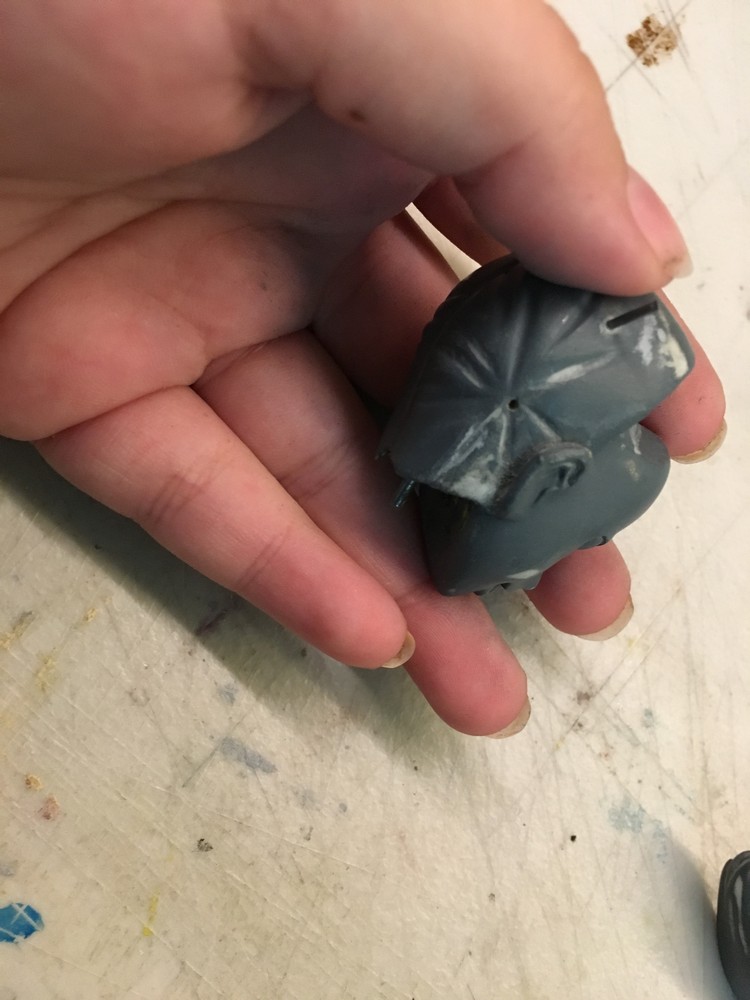
(Left) Few popped resin buubles filled and sloothed out, few deamlenes behind her ear and pigtail insert. (Right) The bangs had it the worst too if you take a look at the parts at the beginning of this album. Filled holes in the bangs and smoothed out everything.
(Left) Underside had it bad in the beginning too, everything got smoothed out but this pic was after the 3rd smoothing phase. (Right) Filling the gap between her front bangs and scalp as much as possible, That way when I paint both hair sections and want to make the seamline gone, I have to putty the seamline, sand then paint over it again.
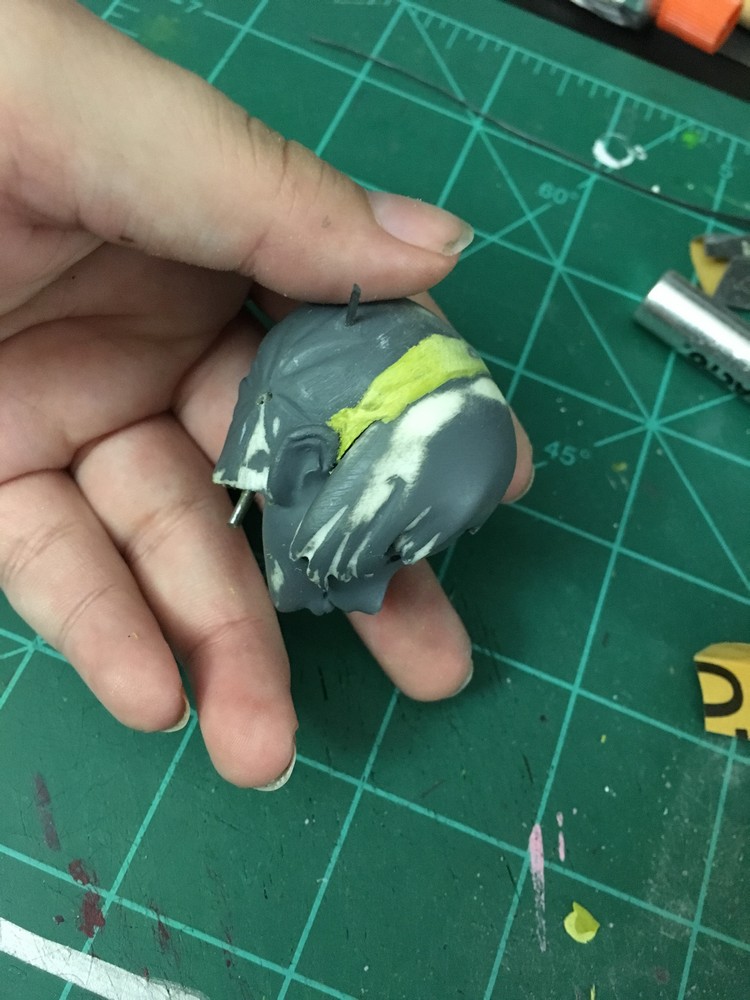
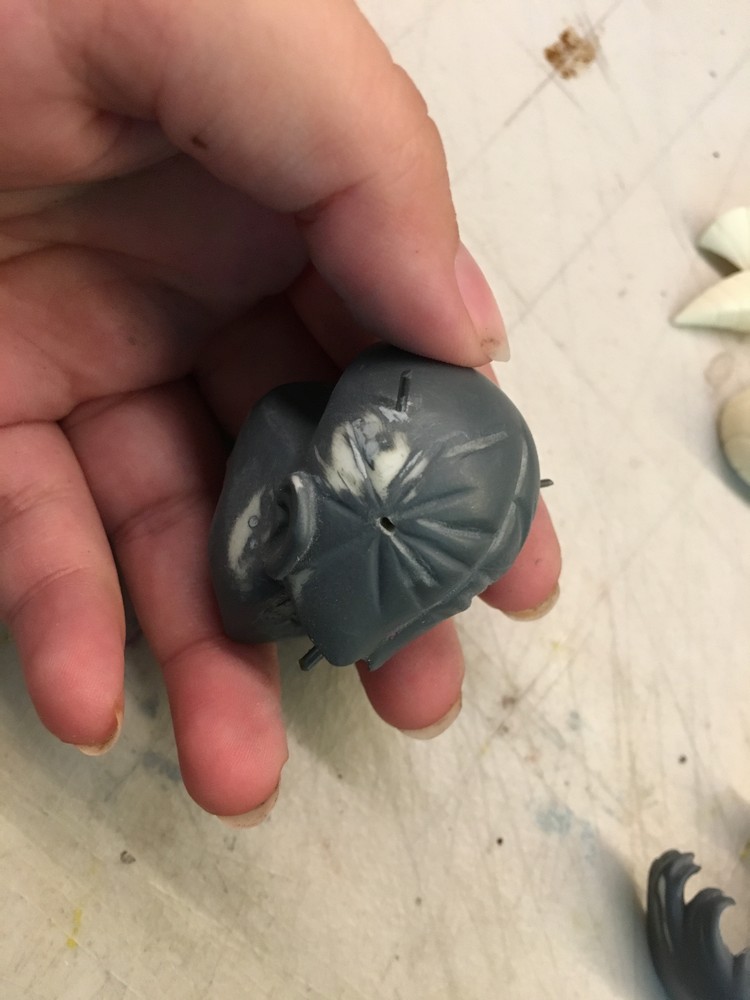
(Left) Extra putty since the corner bangs broke off. (Right) Few sanding and test prime attempts.

(Left) Fixing side of bang, putty had vaseline stillon it and broke off. (Right) Checking horn poistioning with the putty additions to her head / bangs.
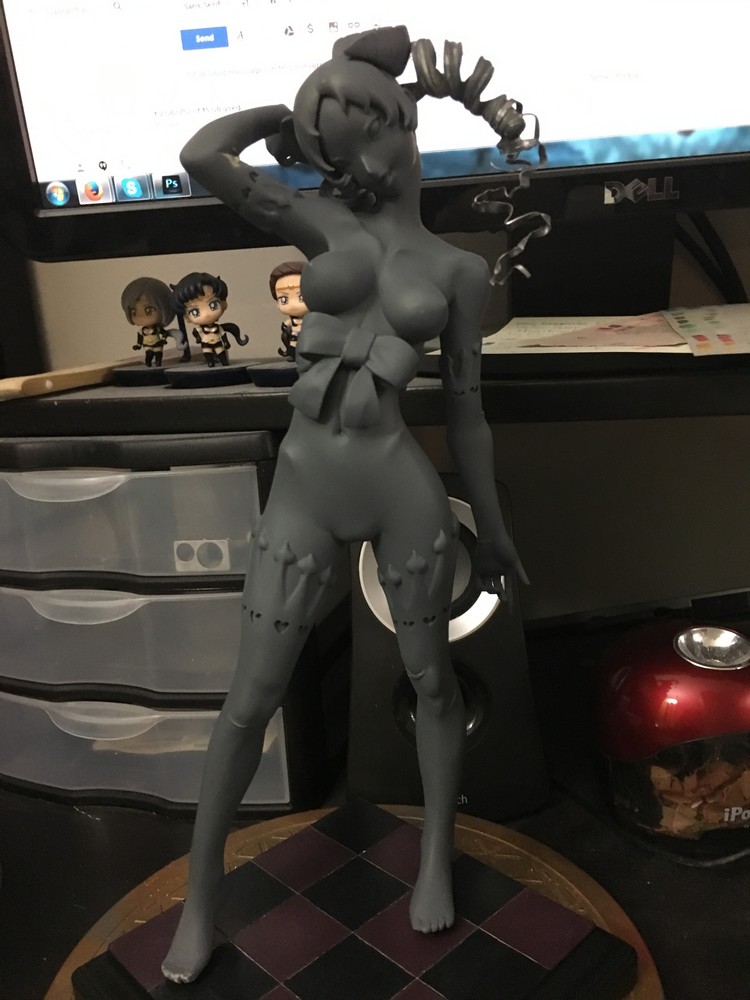
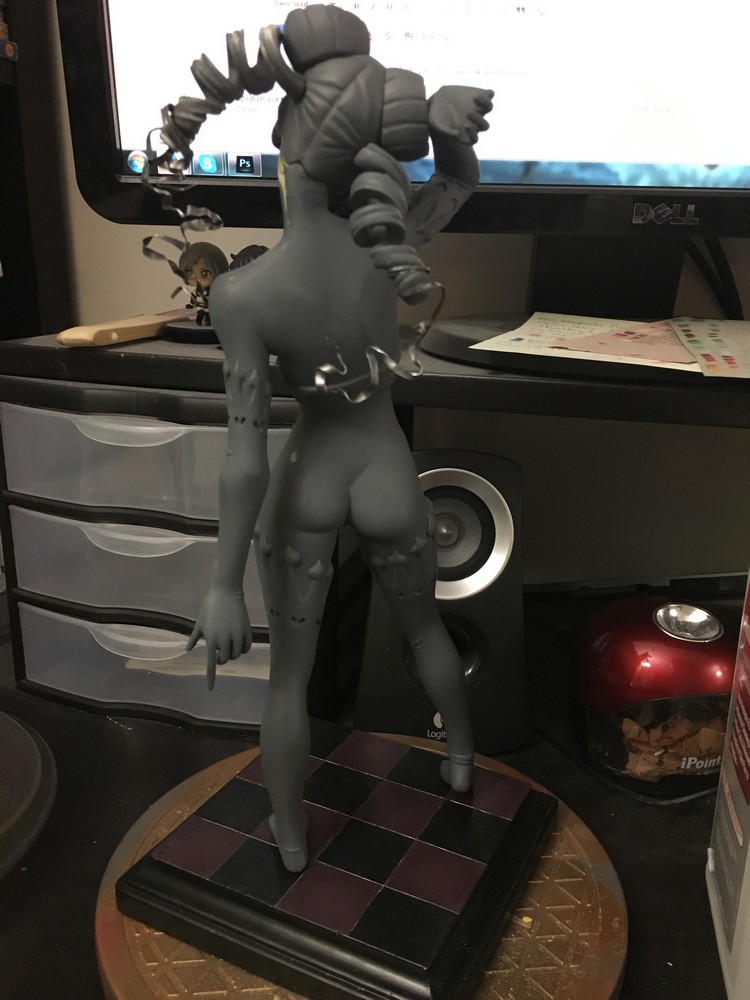
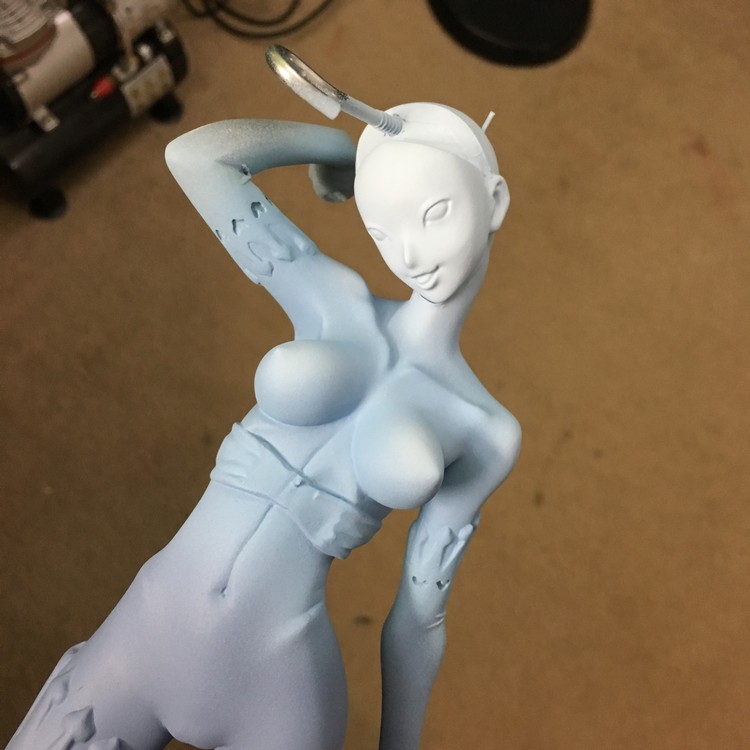
Test to final priming stages after removing bumps with a higher grit. Hair extensions not final, was playing around with some spare aluminum sheets.
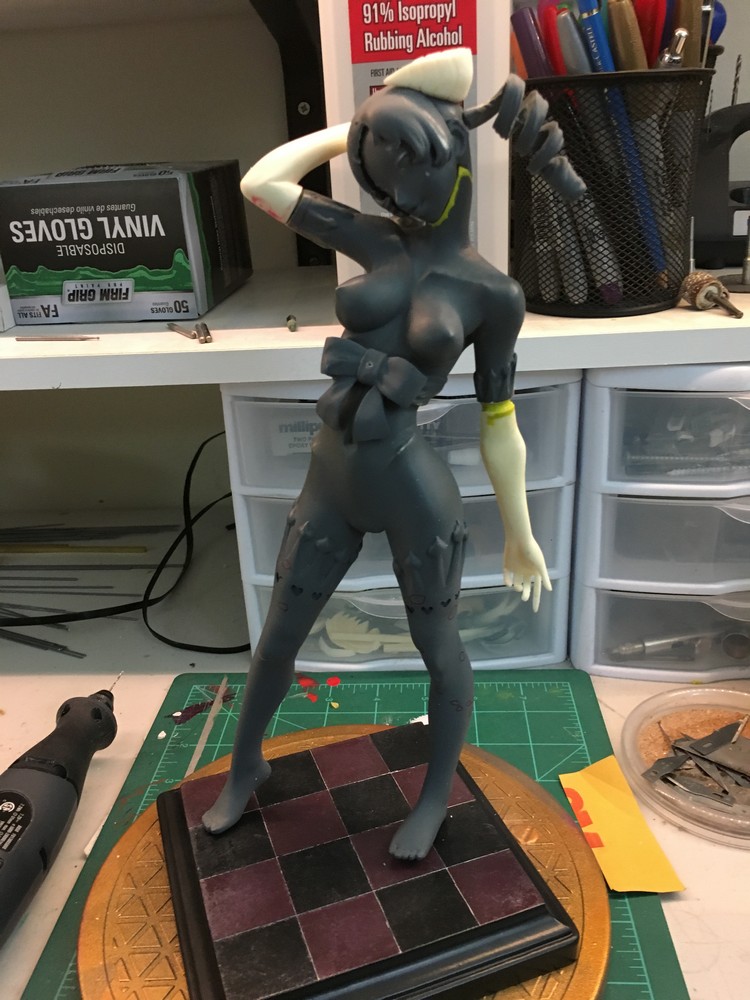
Wanted the face more paler than some screenshots we reviewed.
Took a few attempts to get the gradient my friend wanted. Basically mixing the in game shots with the main illustration gradient style but having a pale face still. Also added highlight layers to pertruding areas such as her knees, back calfs, shoulders, breasts, etc.
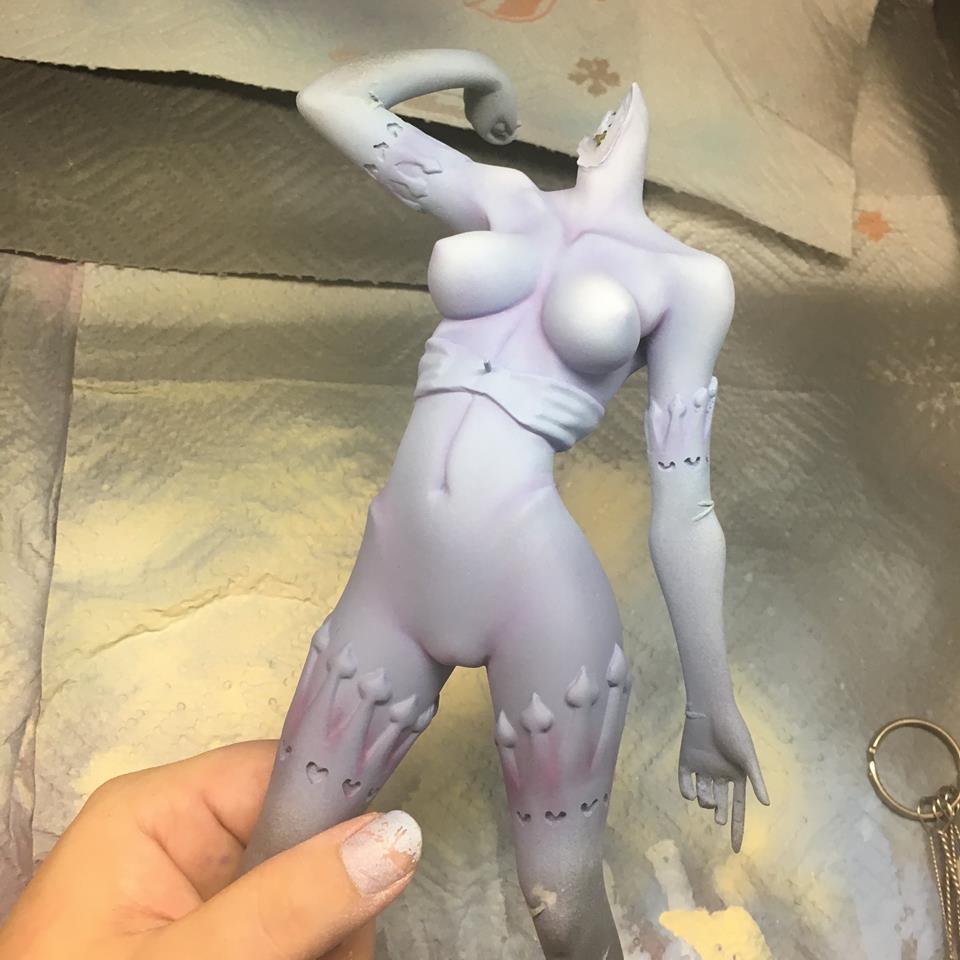
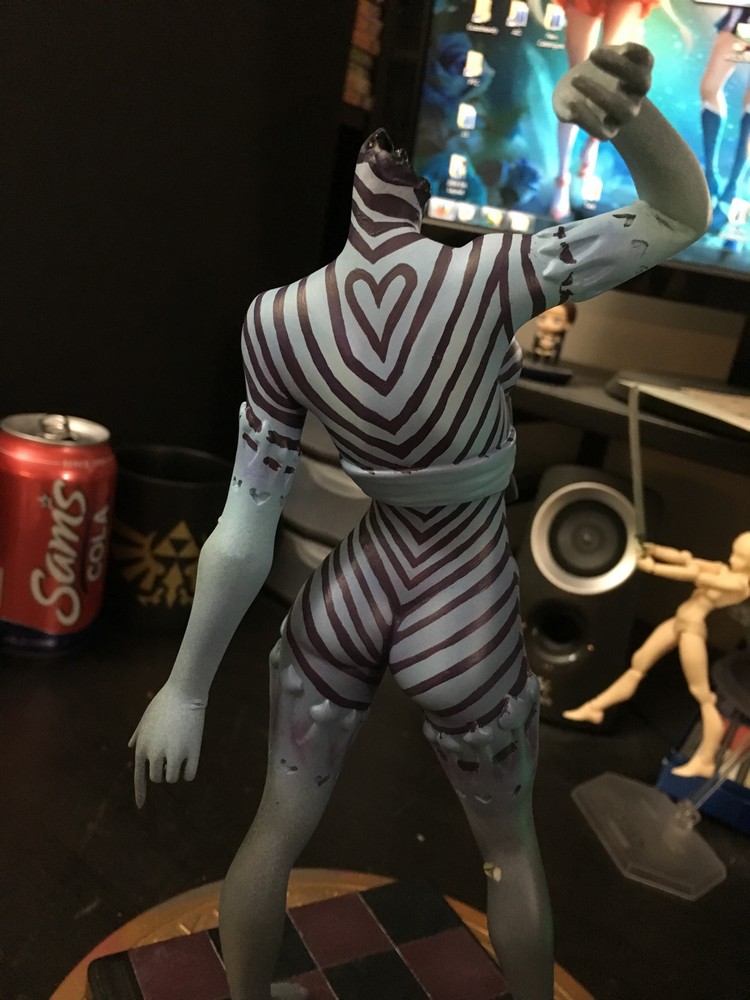
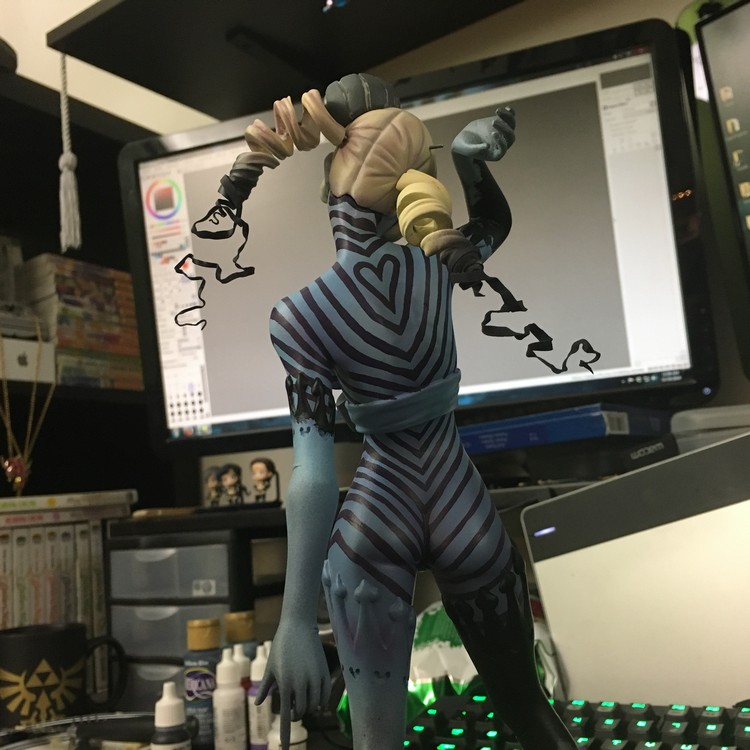
After adding minimal pastel shading to her skin. Did two tones which was a burgundy and pruple shadows. Even though her striped will cover her alot, still taking the opportunity to add that extra detail.
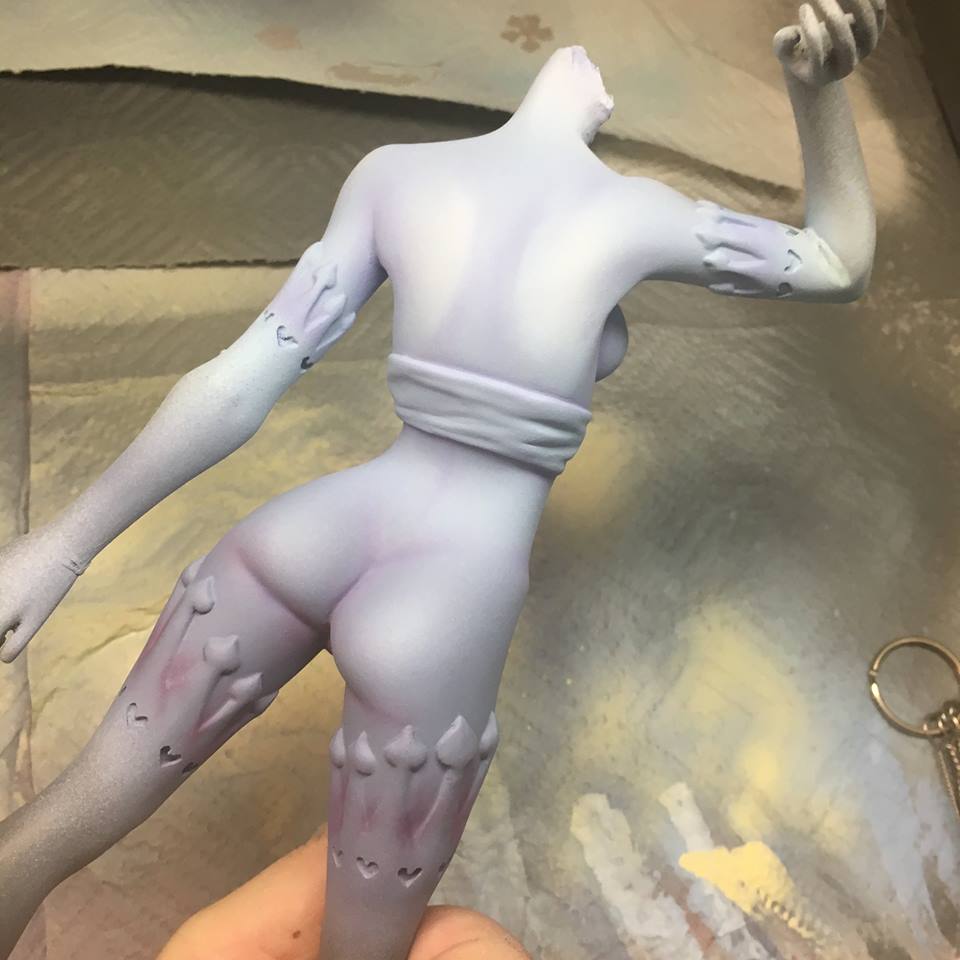
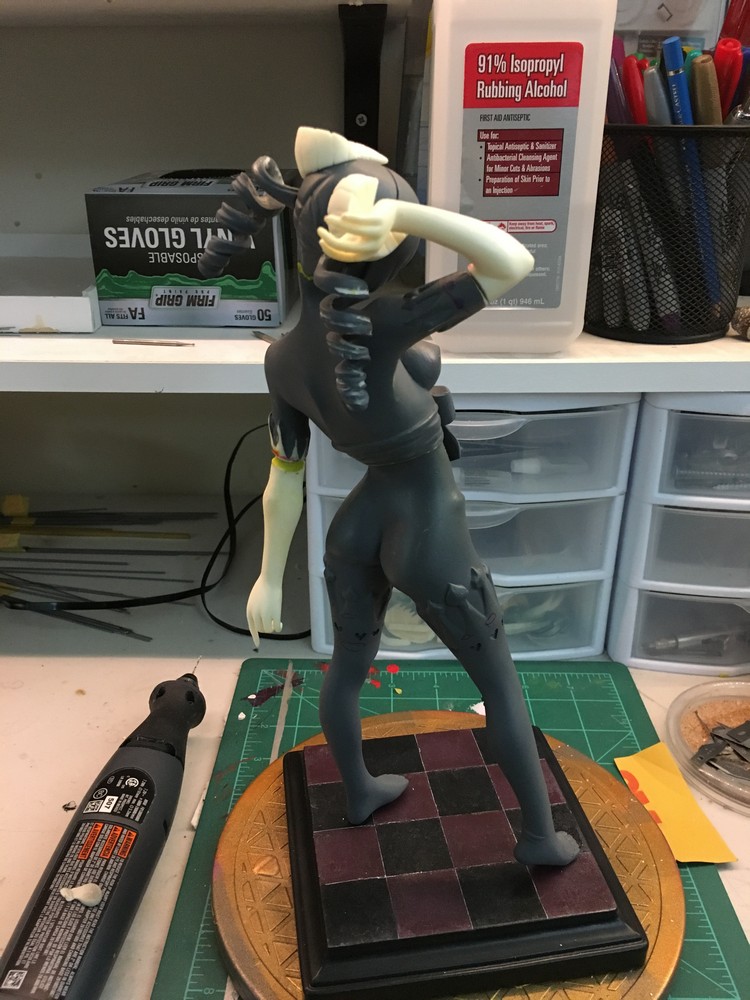
Just a back side look. After I seal her body the colors will pop more.

After I sealed her body in two coats, I wanted to try a different method of painting instead of masking stripes till the end of my days. So After I sealed the body 2 times, I hand painted the stripes one by one to get the right look to match the illustrations then customizing the back of her neck a bit. Anytime I messed up, I carefully dipped an angled cut Q-tip into water and scratched away the paint, then used the end of a Q-tip to erase the reminants off of her. So far the test was a success!
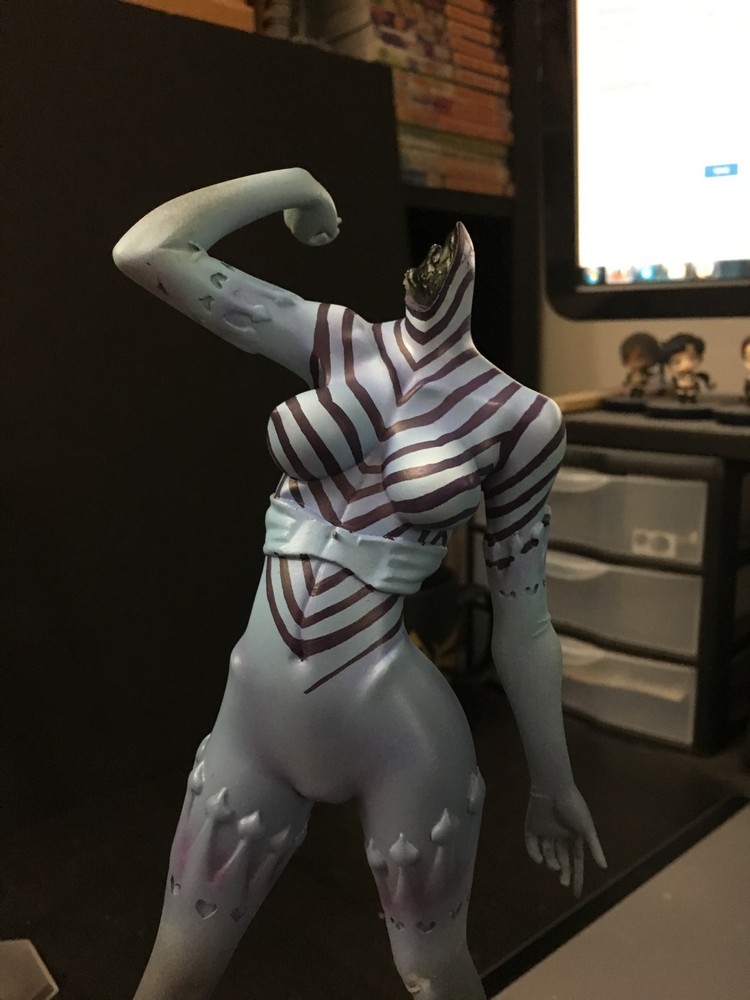
Mainly while I was drafting out the lines, I went back carefully and touched up the edges using the above method with the Q-tips so I got sharp angled edges. This method was not yet applied to this photo above. Anyway, as for color of the lines, I am very iffy about using pure blacks on everything, given your limited what you can add for shadow detail, so we agreed on a dark purple color to compliment her.
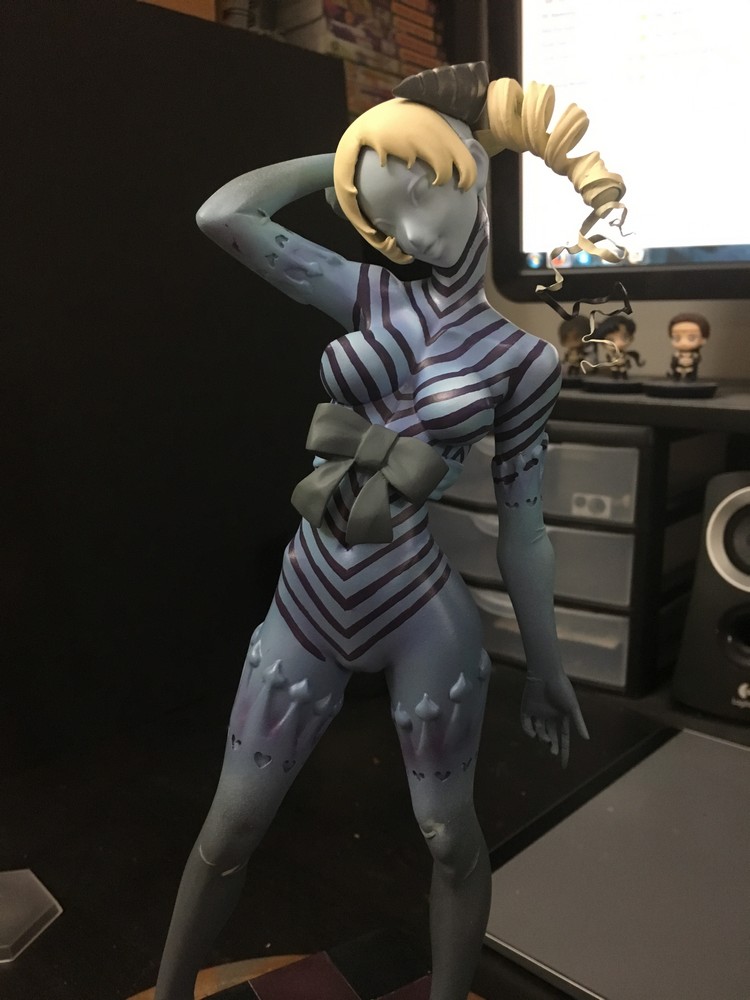
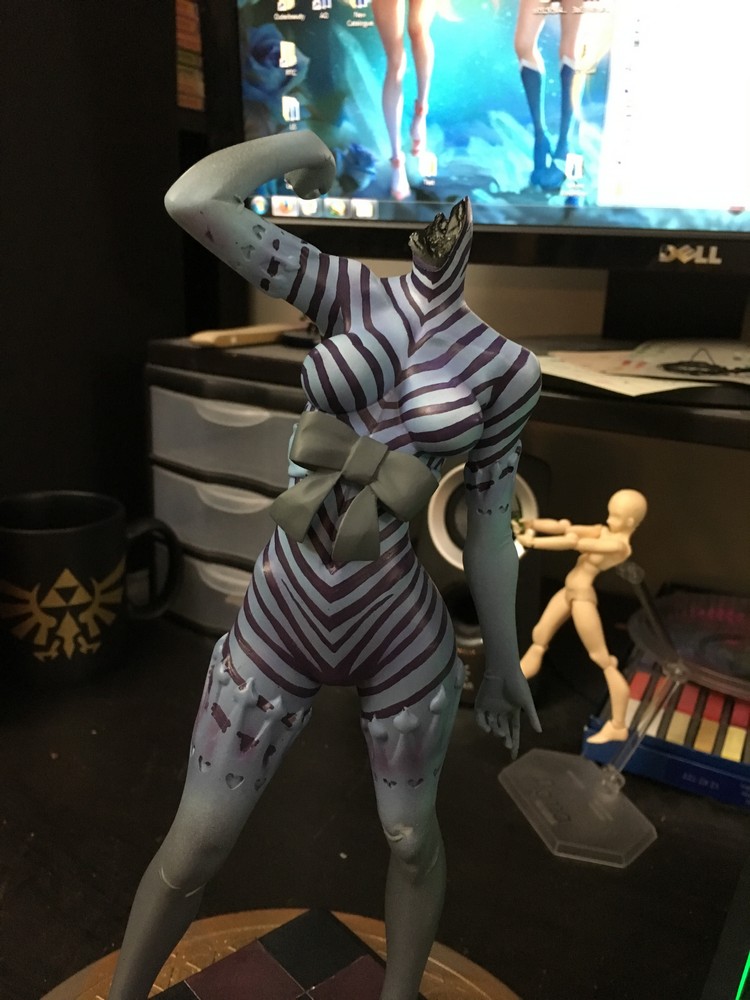
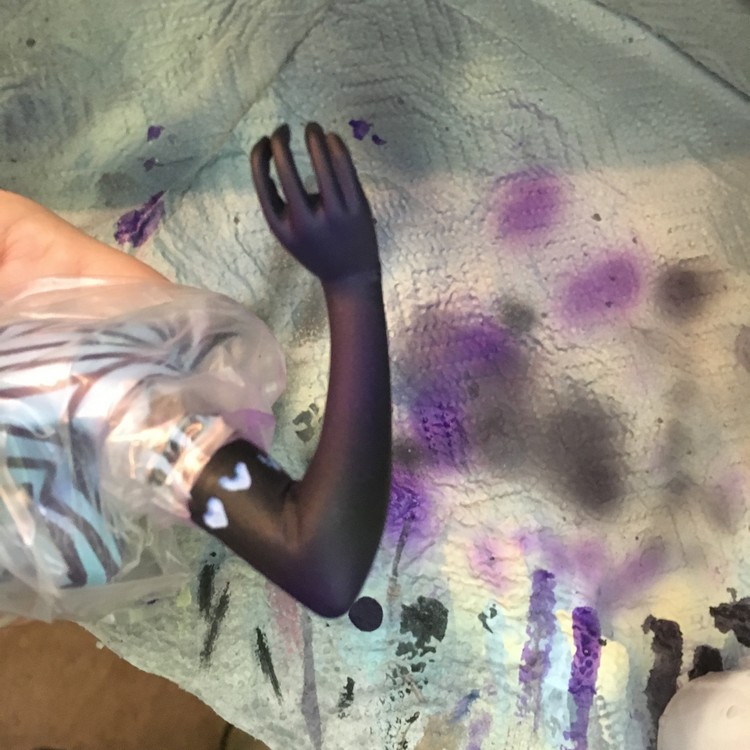
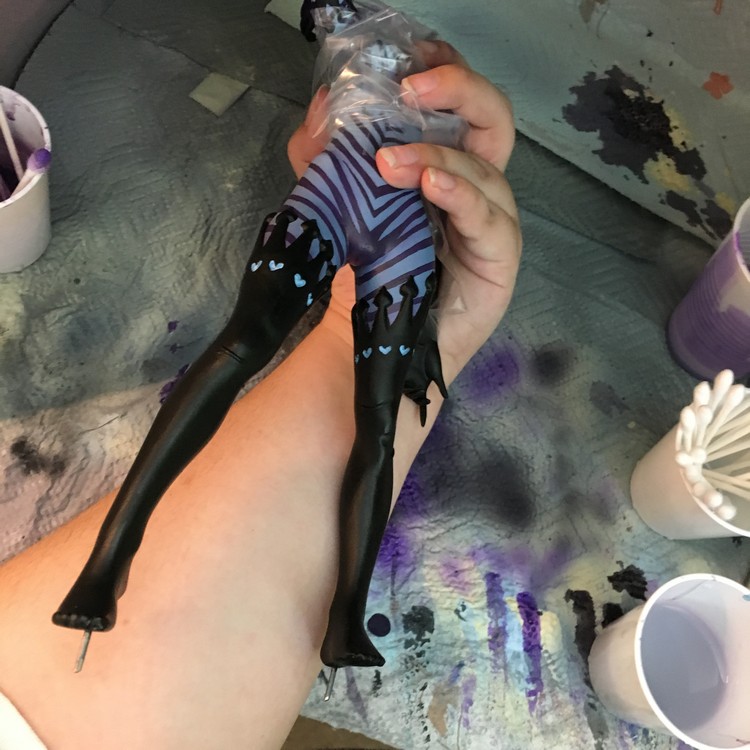
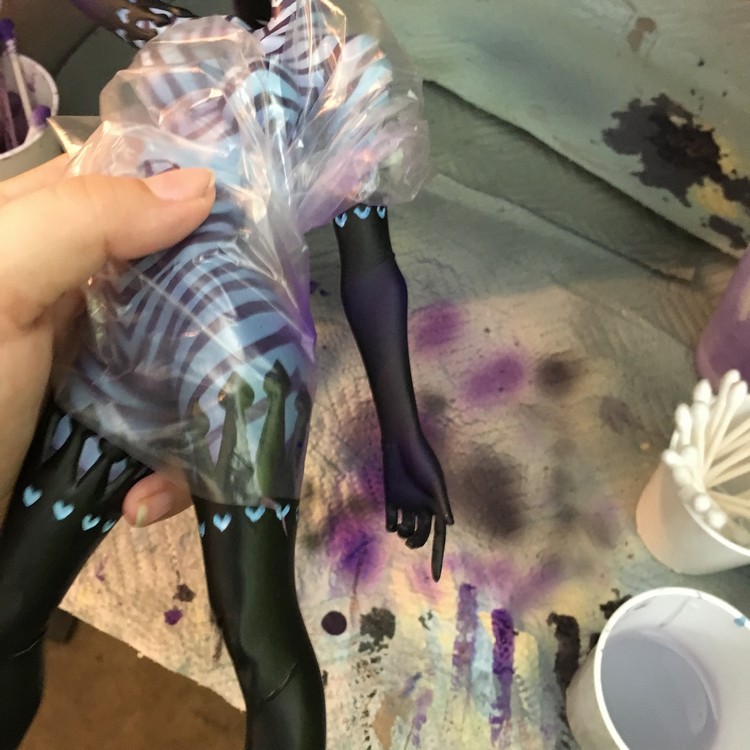
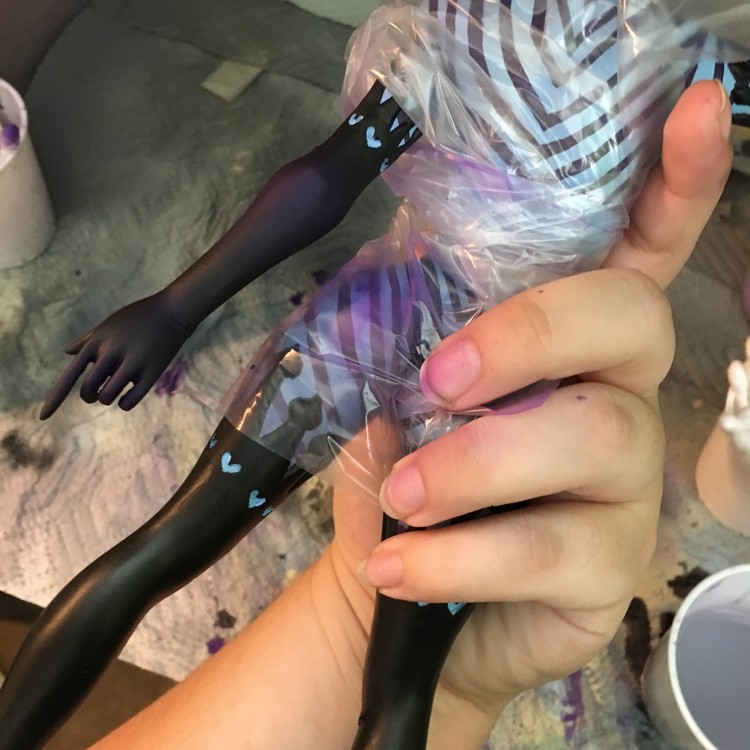
After all of that was done I went in and painted her gloves the same dark color ised on her stripes but just a tad darker I belive. *trying to remember now, lol* Anyway, after I did that, I went in with a bright purple and layered the color until I built up opacity.
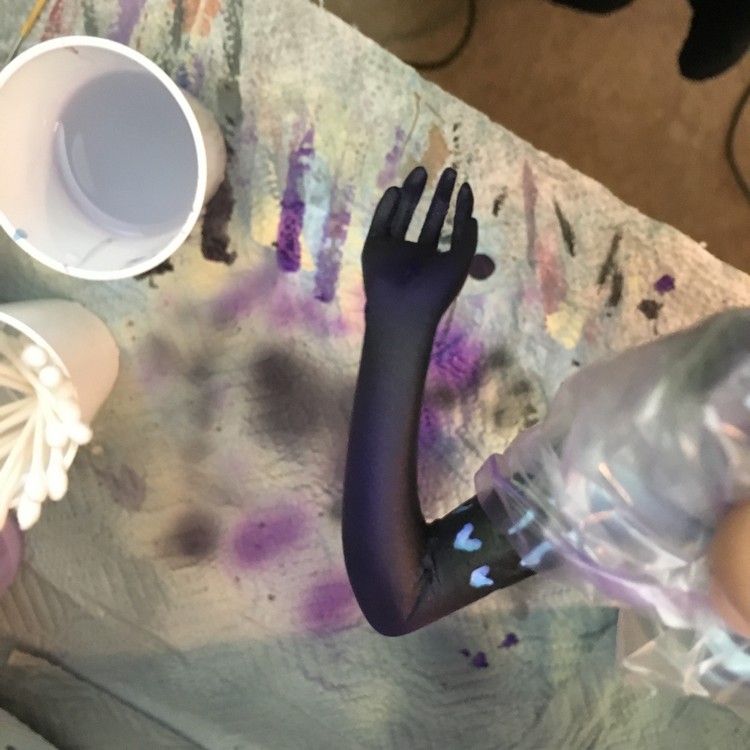

Used plastic bags to cover areas roughly, given I was just mysting the purple highlight color on her legs.

After that long overdue project was over, it was time to say farewell to good ol' Catherine, and she was shipped off out of my country *tear*